You know those moments in life that just stick with you? I’ll never forget the smell of my mom’s marble cake wafting through our little Canton kitchen—it was like comfort had taken form and was giving us all a warm hug. I’d be bouncing around, trying to steal bites of the batter when my mom wasn’t looking, my nose betraying me as I licked icing off my fingers. Turns out, that cake wasn’t just delicious; it was a symbol of family time, laughter, and love. Fast forward to today, and I’m here to share that magic with you with my Marble Cake recipe. It’s SO GOOD you’ll wonder why you ever settled for anything less.
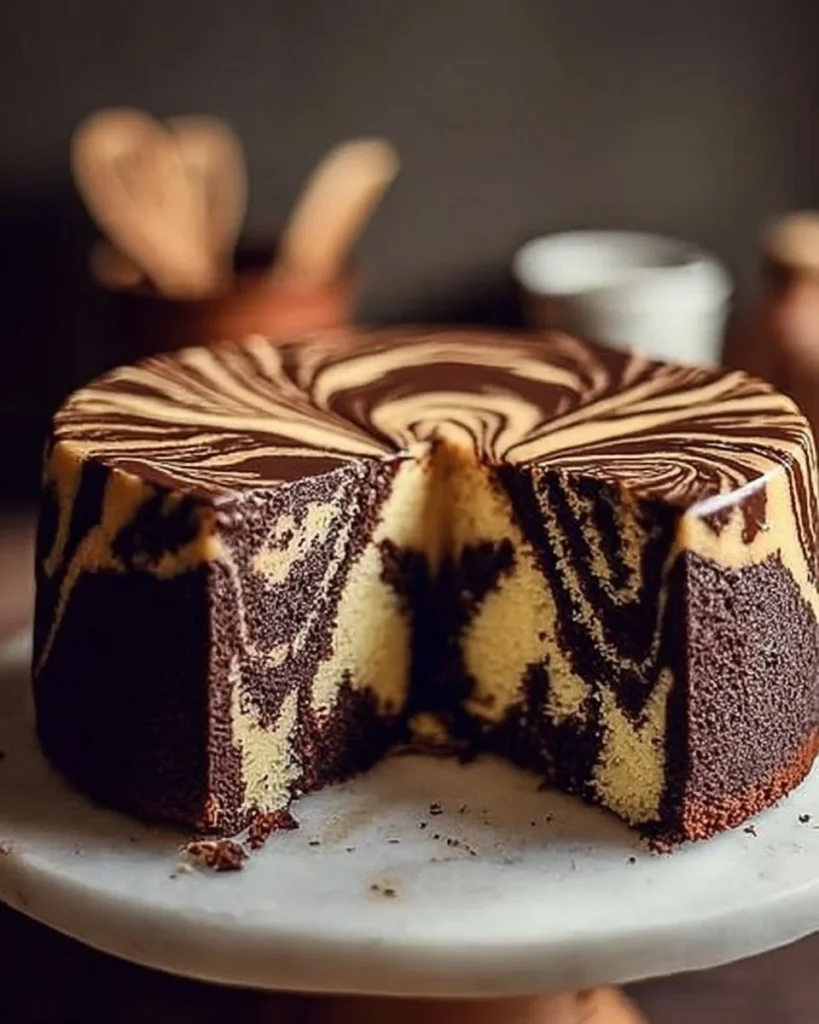
This Marble Cake brings together the best of both worlds: rich chocolate and classic vanilla, swirled together in a perfect harmony. Sounds UNREAL, right? Trust me, after one bite, you’ll ME? OBSESSED? And hey, if you’re like me and need to keep things simple in the kitchen, this recipe is quick, budget-friendly, and—here’s the kicker—freezer-friendly. It’s practically a crowd-pleaser, loved by kids and adults alike.
Let’s roll up those sleeves and bake.
Ingredients Needed
To whip up this delicious Marble Cake, you’ll need:
Base Ingredients:
- 1 3/4 cups all-purpose flour
- 1 cup granulated sugar (for sweetness that matters)
- 1/2 cup unsalted butter, softened (softened, so it creams easier)
- 1 cup milk (for that luscious texture)
- 3 1/2 teaspoons baking powder
- 1 teaspoon vanilla extract (for flavor, of course)
- 3 large eggs
- 1/4 teaspoon salt (to balance the sweetness)
Chocolate Batter:
- 1/2 cup cocoa powder (for the rich chocolate flavor)
How to Make This Recipe
Step 1: Preheat and Prep
Preheat your oven to 350°F (that’s 175°C for my international friends out there). Grease and flour a 9×5 inch loaf pan. This step is crucial—nobody likes a cake that sticks!
Step 2: Creaming It Up
In a mixing bowl, grab that softened butter and granulated sugar. Cream them together until it’s light and fluffy—this is what dreams are made of! Then, add the eggs one at a time, mixing well after each addition. Toss in that dreamy vanilla extract and mix it like you’re playing a tune in the kitchen.
Step 3: Dry Ingredients Unite
In a separate bowl, whisk together the flour, baking powder, and salt. Gradually add this dry mixture to the fluffy butter-sugar-egg mixture, alternating with the milk. You want it well combined, but don’t overdo it; we’re aiming for a smooth and thick batter.
Step 4: Chocolate it Up
Now, divide that batter in half. Stir the cocoa powder into one of those halves. This is where the magic begins! You should see that deep chocolate color—like a delicious blanket over half of your batter.
Step 5: Layering Magic
Pour the vanilla batter into the prepared loaf pan, then gently pour the chocolate batter right on top. Grab a knife and swirl it through the batter to create that beautiful marbled effect—think abstract art but way tastier!
Step 6: Bake it Off
Pop that loaf in the oven and let it bake for 45-50 minutes. You’ll know it’s ready when a toothpick inserted in the center comes out clean. The smell will start to fill your kitchen, and trust me, you’ll be counting those minutes in anticipation.
Step 7: Cool to Perfection
Once done, let it cool in the pan for a bit before transferring it to a wire rack. Now’s the tough part—waiting until it cools completely before slicing in. But, oh, is it worth it!
How to Store It
After all this hard work, you want to make sure your Marble Cake stays fresh. Store it at room temperature for up to three days in an airtight container. If you’re not diving in right away (why?), you can also freeze it. Just wrap it tightly in plastic wrap and then in foil. It’ll be good for about three months. When you’re ready, thaw it in the fridge overnight or at room temperature for a few hours.
Expert Tips
- For extra flavor, consider adding a pinch of cinnamon to the batter. It gives it a lovely depth.
- If you’re feeling adventurous, swap in your favorite milk for a twist—almond milk works wonders!
- In a time crunch? You can make mini loaves instead! Just adjust baking time to 25-30 minutes.
Conclusion
So there you have it! This Marble Cake isn’t just a recipe; it’s a foundation for making memories. The blend of flavors is perfect for any occasion—whether it’s a family gathering or just a sweet way to end your day. If you whip this up, I’d love it if you’d leave a star rating and let me know how you made it your own.
And hey, share it with your cousin who never shows up empty-handed. You know the one I mean. Did you add your own spin? I wanna hear it!
FAQ Section
Can I use cake flour instead of all-purpose flour?
Here’s the deal: you can! Just use the same amount, but your cake might turn out a little more tender and light.
How do I know when my Marble Cake is done?
Real talk: the toothpick test is your best friend. Stick it in the center; if it comes out clean, you’re golden!
Can I customize the flavors?
Absolutely! You can mix in different flavor extracts or even toss in some chocolate chips for an extra treat!
If you’re craving something sweet to go with your Marble Cake, my Classic Chocolate Chip Cookies are always a hit. They practically scream comfort!

Marble Cake
Ingredients
Base Ingredients
- 1.75 cups all-purpose flour
- 1 cup granulated sugar for sweetness that matters
- 0.5 cups unsalted butter, softened softened, so it creams easier
- 1 cup milk for that luscious texture
- 3.5 teaspoons baking powder
- 1 teaspoon vanilla extract for flavor, of course
- 3 large eggs
- 0.25 teaspoons salt to balance the sweetness
Chocolate Batter
- 0.5 cups cocoa powder for the rich chocolate flavor
Instructions
Preparation
- Preheat your oven to 350°F (175°C). Grease and flour a 9x5 inch loaf pan.
- In a mixing bowl, cream together the softened butter and granulated sugar until light and fluffy. Add eggs one at a time, mixing well after each addition. Then mix in the vanilla extract.
- In a separate bowl, whisk together the flour, baking powder, and salt. Gradually add this mixture to the butter-sugar-egg mixture, alternating with the milk, until well combined.
- Divide the batter in half and stir the cocoa powder into one half.
Baking
- Pour the vanilla batter into the prepared loaf pan and then pour the chocolate batter on top. Use a knife to swirl through the batter for a marbled effect.
- Bake for 45-50 minutes, or until a toothpick inserted into the center comes out clean.
Cooling
- Let the cake cool in the pan for a few minutes before transferring it to a wire rack to cool completely.


