Mini Easter Cheesecakes
These adorable mini cheesecakes are easy to make, perfect for Easter celebrations, and topped with delicious chocolate eggs. A light and airy treat that's crowd-pleasing and customizable for any spring event.

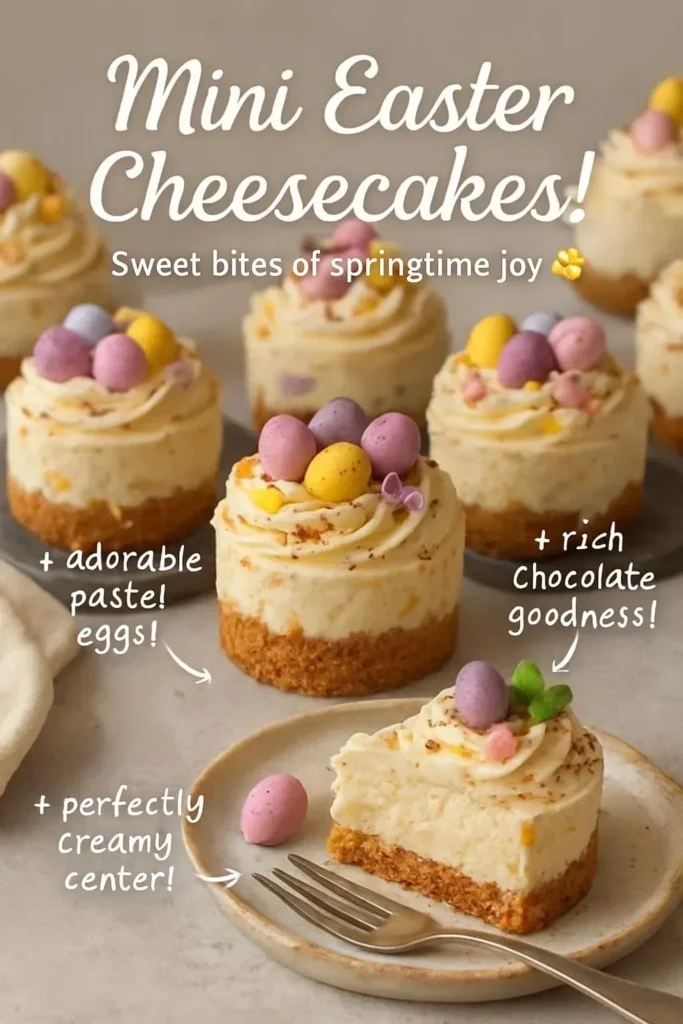
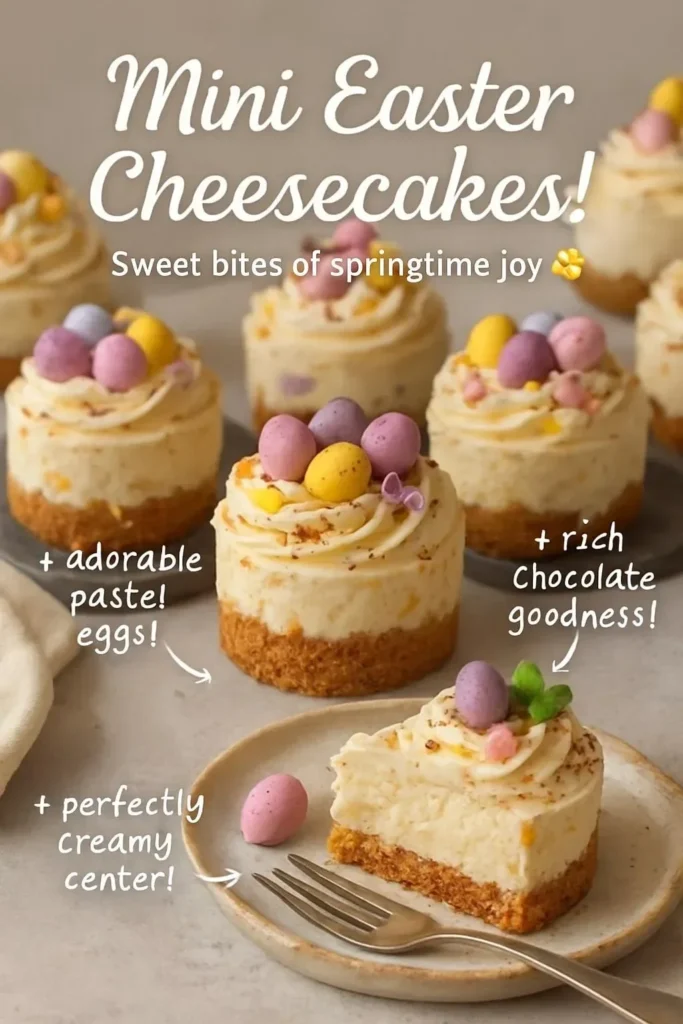
I make these mini Easter cheesecakes every spring when I want something cute, quick, and crowd-pleasing. Small, handheld and topped with chocolate eggs, they’re perfect for family brunches, school parties, or an Easter dessert table when you don’t have hours to bake and decorate. If you’re into tiny desserts, this keeps the classic cream-cheese richness but in a playful, shareable size — and it’s easy enough to let kids help with the finishing touches. For another compact cheesecake idea, check this mini cheesecakes recipe for inspiration.
Why you’ll love this dish
These mini cheesecakes hit the sweet spot between fuss-free and festive. They’re quick to assemble, use pantry-friendly ingredients, and give you an impressive-looking dessert without turning on the oven for a long time. Because the filling is whipped, the texture is light and airy rather than dense — ideal for spring gatherings where you want something sweet but not heavy.
Reasons to choose this recipe:
- Fast assembly: most of the work is crushing biscuits and whipping cream.
- Crowd-friendly portions: makes multiple bite-sized treats for sharing.
- Customizable: simple toppings let you match any Easter theme or flavor.
How this recipe comes together
Before you grab the bowls, here’s a quick overview so you know what to expect. You’ll crush biscuits and combine them with melted butter to form a crisp base. Next, you’ll beat the cream cheese with powdered sugar and vanilla for a smooth center. Whip double cream to soft peaks and fold it into the cheese for a light, mousse-like filling. Spoon the filling over the biscuit crusts in lined muffin cups, chill until set, then decorate with chocolate eggs and spring sprinkles.
This layout means most of the time is passive chilling — active prep is under 30 minutes.
What you’ll need
- 200g digestive biscuits (or graham crackers)
- 100g unsalted butter, melted
- 400g cream cheese, softened
- 100g powdered (icing) sugar
- 1 teaspoon vanilla extract
- 200ml double (heavy) cream
- Chocolate eggs, for decoration (Cadbury mini eggs work well)
- Spring-themed edible decorations (optional: sprinkles, edible flowers)
Substitution notes:
- Use low-fat cream cheese for a lighter version, but texture will be less rich.
- If you can’t find double cream, use heavy whipping cream with the same volume.
- For a gluten-free crust, swap digestive biscuits for a gluten-free biscuit or crushed nuts plus a touch more butter.
Step-by-step instructions
- Preheat the oven to 160°C (320°F) and line a muffin tray with cupcake liners. (Note: you don’t need to bake unless you prefer a firmer crust — see Tips below.)
- Crush the digestive biscuits until fine crumbs form. Mix crumbs with the melted butter until the texture resembles wet sand.
- Press about 1–2 tablespoons of the biscuit mixture firmly into the base of each cupcake liner to form an even crust.
- In a mixing bowl, beat the cream cheese with the powdered sugar and vanilla until completely smooth and lump-free.
- In a separate bowl, whip the double cream until soft peaks form.
- Fold the whipped cream gently into the cream cheese mixture in two additions to preserve air and keep the filling light.
- Spoon the cheesecake filling over the biscuit bases, smoothing the tops with the back of a spoon or an offset spatula.
- Chill the mini cheesecakes in the fridge for at least 4 hours, or until set.
- Once set, top each mini cheesecake with chocolate eggs and optional spring decorations. Serve chilled.
01Ingredients
Crust Ingredients
Filling Ingredients
Toppings
02Method
- Preparation
- Chilling
Tap a step when it's done. The next one lights up.
0 OF 10 DONE03Recipe notes
- 01Store in an airtight container in the fridge for up to 4 days. Best eaten within 48 hours for peak texture and freshness. Optional: Freeze un-decorated cheesecakes for up to 1 month.
How did it turn out?
No ratings yet. Tap a star to be the first.
Snap a photo and tag @recipe_smoke1 so I can see how yours came out.
Best ways to enjoy it
- Plate them on a tiered cake stand for a charming brunch centerpiece.
- Serve alongside fresh berries (strawberries or raspberries) to cut the sweetness and add color.
- Pair with a bright, floral tea (like Earl Grey or chamomile) or a light sparkling white grape juice.
- For kid-friendly presentation, place a different colored egg on each cheesecake and label flavors or toppings with small flags.
Storage and reheating tips
Refrigeration: Store in an airtight container in the fridge for up to 4 days. Best eaten within 48 hours for peak texture and freshness.
Freezing: Freeze un-decorated cheesecakes on a tray until solid, then transfer to a freezer-safe box for up to 1 month. Thaw in the fridge for several hours before decorating.
Food safety: Because these contain dairy and no preservatives, keep them refrigerated and discard if left out at room temperature for more than 2 hours.
Reheating: These are best served chilled — do not microwave. If you want a slightly softer filling, let them sit at room temperature for 10–15 minutes before serving.
Creative twists
- Lemon-vanilla: Add 1 tablespoon lemon zest and 1 tablespoon lemon juice to the cream cheese mixture for a citrus lift.
- Chocolate base: Replace 50g of biscuits with chocolate cookies for a richer crust.
- Berry swirl: Fold in a tablespoon of thick berry compote into each filling portion for pretty swirls.
- Nutty crunch: Mix 2 tablespoons chopped toasted almonds or hazelnuts into the crust.
- Flavor boost: Add 1-2 tablespoons of almond or hazelnut syrup to the filling for extra depth.
Common questions
Do these cheesecakes need to be baked?
A: The filling is no-bake — chilling sets it. The recipe calls for preheating the oven because some cooks like to briefly bake the crust for extra firmness, but it’s optional. If you bake the crust, 6–8 minutes at 160°C is enough.
How many mini cheesecakes does this recipe make?
A: Yield depends on muffin tray size, but this quantity usually fills a standard 12-cup muffin tin (about 12 mini cheesecakes). Use a small scoop for consistent portions.
Can I prepare these ahead of time?
A: Yes — assemble and chill up to 24 hours before decorating. If freezing, follow the freezing guidance above and decorate after thawing.
What if my filling is too runny?
A: Make sure the cream cheese is not overly warm and the double cream is whipped to soft peaks (not loose). Chill the mixture briefly before filling if needed. Using full-fat cream cheese and cream helps the filling set properly.
Are these safe for kids to decorate?
A: Absolutely — they’re ideal for kid-friendly decorating parties. Supervise younger kids with small candies to avoid choking hazards.
Conclusion
These mini Easter cheesecakes are an easy, festive treat that looks far fancier than the effort required. If you want another take on mini Easter-style cheesecakes, see the recipe for Jane’s Patisserie Mini Easter Cheesecakes for inspiration. Looking for more? Try my Easter Egg Cheesecake. Happy baking — and enjoy the decorating!
 Dessert
 Dessert
 Dessert
