Pickled Banana Peppers
These quick pickled banana peppers are a tangy and crunchy addition to sandwiches, salads, and more. Easy to prepare and perfect for refrigerator storage.

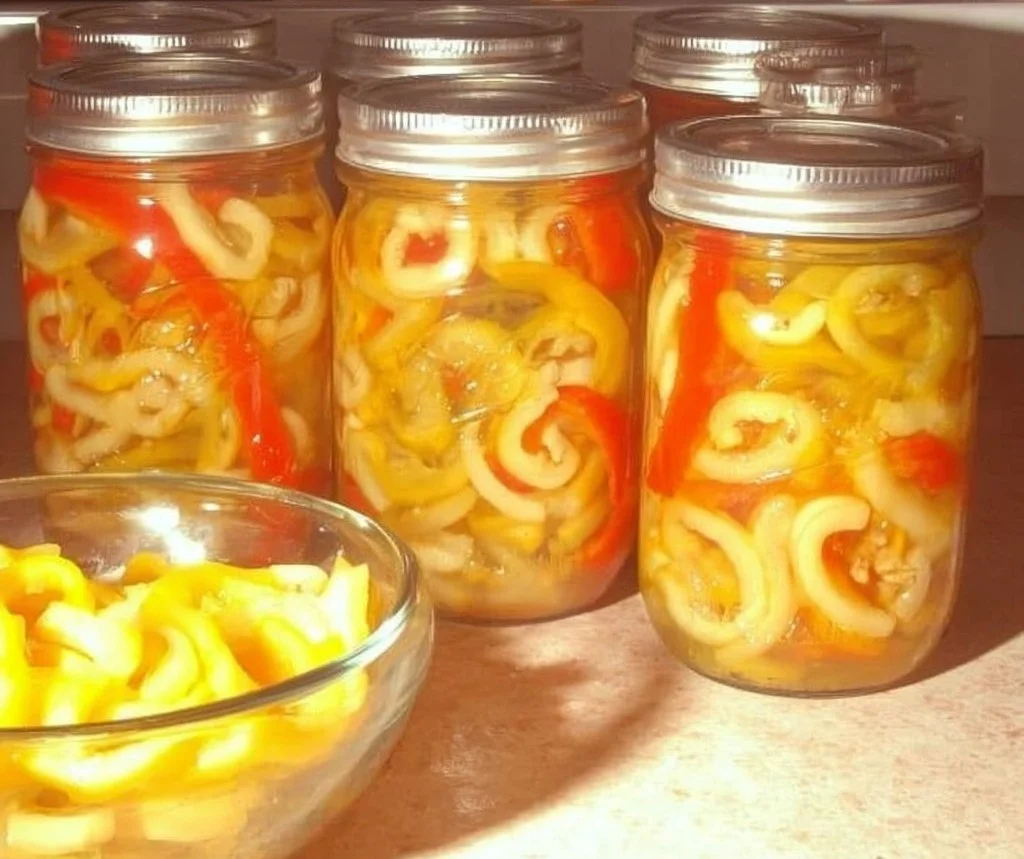
I love the snap and bright zip of pickled banana peppers—easy to make, endlessly useful, and quicker than you’d think. I often keep a jar on hand to top sandwiches, boost salads, or wake up a plain cheese pizza. If you like bold, tangy crunchs that take only one cooktop step, this is an ideal refrigerator-style pickle to make any time you have a pound of peppers.
Why you’ll love this dish
Pickled banana peppers are a small but transformative pantry addition. They’re:
- Fast: no long fermentation or complicated canning required if you refrigerate.
- Budget-friendly: one pound of peppers, pantry spices, and a simple brine.
- Versatile: use them on sandwiches, in salads, with grilled meats, or as part of a snack board.
- Kid-friendly (adjust heat): banana peppers are milder than jalapeños, so they’re approachable for most palates.
How this recipe comes together
This is a quick brine pickle. You’ll:
- Layer whole spices in clean jars to flavor the peppers from the bottom up.
- Heat a simple brine of water, vinegar, salt, and sugar until dissolved and boiling.
- Pack sliced banana peppers and garlic into the jars, leaving a little headspace.
- Pour the very hot brine over the peppers to cover them completely.
- Let jars cool to room temperature, then refrigerate (or process for pantry storage if you follow safe canning steps).
This sets expectations: it’s a hands-on 20–30 minute active cook time, then patience for flavors to develop (best after 24–48 hours).
Gather these items
- 1 lb banana peppers, sliced (rings or strips)
- 1 cup white vinegar (5%) or apple cider vinegar (5%)
- 1 cup water
- 2 tsp salt
- 3 tsp sugar
- 10–12 garlic cloves, peeled and thinly sliced
- 3 tsp mustard seeds
- 2 tsp whole black peppercorns
- 2 tsp coriander seeds
Substitution notes:
- Use apple cider vinegar for a fruitier note. Do not use vinegars under 5% acidity for safe pickling without canning.
- Honey or maple syrup can replace sugar for a different sweetness profile; use the same weight (start with slightly less and taste later).
- Add red pepper flakes for more heat, or fresh dill for a herb-forward twist.
Step-by-step instructions
- Sterilize or wash jars and lids in hot, soapy water. Place mustard seeds, black peppercorns, and coriander seeds in the bottom of each jar.
- In a small saucepan combine the water, salt, and sugar. Warm over medium heat, stirring until salt and sugar dissolve.
- Bring the mixture to a gentle boil, then pour in the vinegar. Let it come back to a boil for about 1 minute, then turn off the heat.
- Pack the sliced banana peppers into the jars. Shake or tap the jar gently to settle the peppers, but don’t cram them so tightly the brine can’t circulate.
- Tuck sliced garlic between the pepper pieces so the flavor distributes evenly.
- Carefully pour the very hot brine over the peppers, leaving about 1 inch (2.5 cm) of space at the top. Make sure all pepper pieces are submerged.
- Wipe jar rims, seal with lids and rings. Let jars cool to room temperature on the counter. Once cool, move to refrigeration unless you process them in a water bath for shelf stability.
Tip: Pouring the brine while it’s hot helps draw a bit more flavor into the peppers and can help create a vacuum seal if you choose to water-bath can them.
01Ingredients
For the Pickling
Whole Spices for Flavor
02Method
- Preparation
- Packing and Storage
Tap a step when it's done. The next one lights up.
0 OF 8 DONE03Recipe notes
- 01Best eaten after a week for full flavor. These pickles can last 6-8 weeks in the refrigerator. Avoid reusing brine for safety reasons. Slicing peppers uniformly helps with even brining.
How did it turn out?
No ratings yet. Tap a star to be the first.
Snap a photo and tag @recipe_smoke1 so I can see how yours came out.
Best ways to enjoy it
- Top cold-cut sandwiches, burgers, or beef hot dogs for immediate acidity and crunch.
- Add to salads or grain bowls to cut through richness.
- Scatter over pizza, flatbreads, or omelets just before serving.
- Build a simple antipasto platter with cheeses, olives, and these peppers.
These tangy peppers are a natural companion to grilled sausages and roasted peppers; try them with my air-fryer sausage and peppers for a no-fuss weeknight meal: air-fryer sausage and peppers. For a weekend brunch twist, serve alongside slices of a sweet loaf like this banana bread pancake mix loaf to balance savory and sweet.
How to store & freeze
Refrigerator storage (recommended if you did not water-bath can): keep in the fridge and use within 6–8 weeks for best flavor and safety.
Pantry storage (only if properly canned): process jars in a boiling water bath according to USDA canning guidelines; then shelf-stable storage can be up to 12 months unopened.
Freezing: not recommended — briny pickles change texture when frozen and become mushy.
Safety note: If you want true shelf stability, follow an approved water-bath canning recipe and sterilization steps. Otherwise, treat these as refrigerator pickles.
Creative twists
- Spicy: add a teaspoon of red pepper flakes per jar or include a sliced jalapeño.
- Sweet & smoky: swap sugar for an equal amount of maple syrup and add a teaspoon smoked paprika.
- Herbaceous: add a sprig of fresh dill or oregano to each jar for a fresher profile.
- Pickled onions + peppers: thinly slice a small red onion and layer with the peppers for color and texture contrast.
- Low-sodium: reduce salt slightly, but increase brining time in the fridge for flavor uptake.
Your questions answered
How long before I can eat them?
A: They’re safe to eat as soon as they cool, but flavor improves after 24–48 hours. Best eaten after a week.
Are these shelf-stable straight from the recipe?
A: Not necessarily. Unless you follow approved canning procedures (sterilize jars and process in a boiling water bath), store in the refrigerator. For shelf stability, process jars according to USDA water-bath canning instructions.
How long will they last in the fridge?
A: Up to 6–8 weeks for peak flavor and safety. If you spot off smells, cloudiness, or mold, discard.
Can I reuse the brine?
A: Reusing brine for another batch is not recommended for safety and flavor reasons. Make a fresh brine each time.
Can I substitute other peppers?
A: Yes — use bell peppers for sweet pickles or hotter chiles for more heat. Adjust sugar and garlic to balance flavors.
Conclusion
Pickled banana peppers are an easy, high-impact addition to your kitchen calendar—quick to make, flexible in flavor, and ready to elevate everything from sandwiches to salads. For more ideas, check out 4-Ingredient Quick Pickled Banana Peppers – Vanilla And Bean and my Homemade Pickled Sweet Peppers. Give one jar a week to mellow, and you’ll find yourself reaching for them more than you expect.

