The Ultimate Guide to Quick Pickled Vegetables
A fast and flavorful way to transform surplus vegetables into tangy, crunchy pickles that are perfect for salads, tacos, and sandwiches.

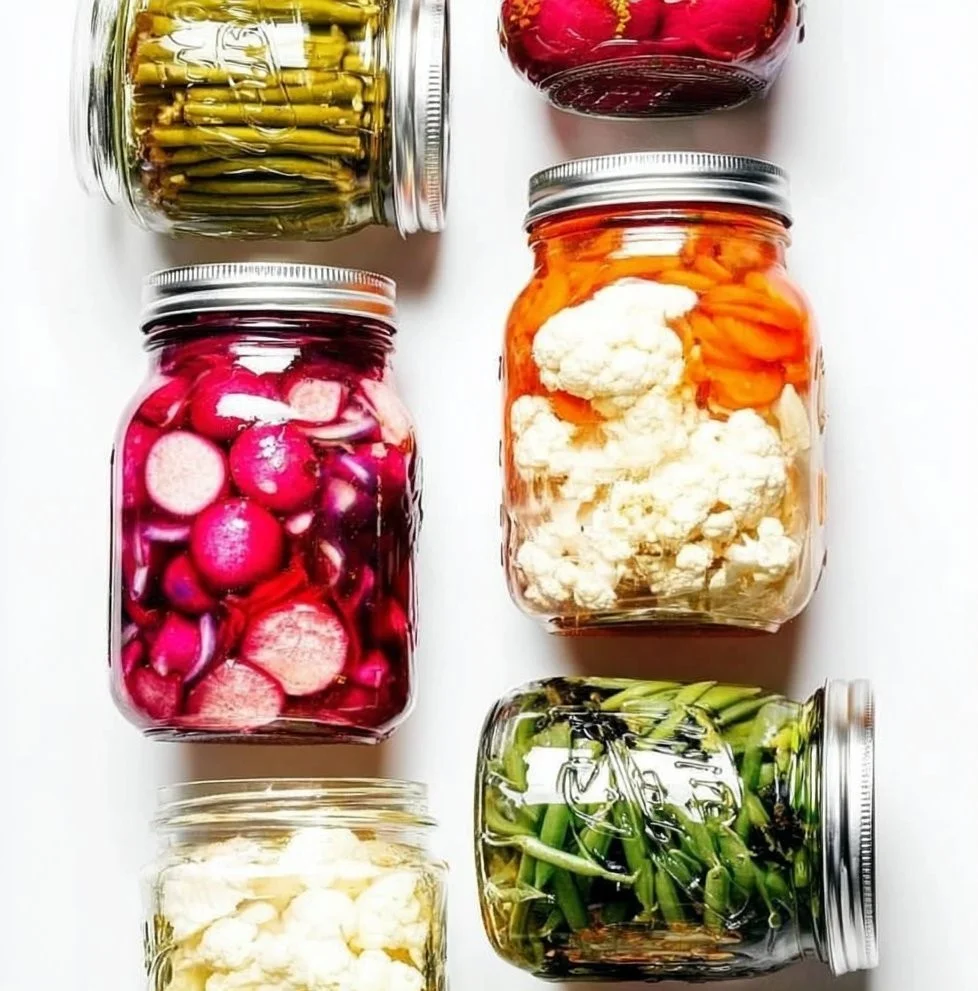
I still remember the first time I tossed crisp cucumber ribbons, bright carrot sticks, and thin red onion into a bubbling brine — in less than an hour the kitchen smelled sharp and sweet, and the jar was gone before dinner. Quick pickled vegetables are the fastest, most rewarding way to add zing to weeknight salads, sandwiches, tacos, and holiday relish trays. They’re also a great way to preserve a vegetable glut from the farmer’s market without committing to full canning.
If you like bold, bright condiments that come together fast, this guide will walk you through everything from brine math to storage. For a sweet finale after a tangy bite, I like serving these alongside lighter desserts like a layered trifle such as the Scoop of Heaven trifle to reset the palate.
Why you’ll love this dish
Quick pickled vegetables are one of those kitchen tricks that feels fancy but is truly effortless. They:
- Transform plain plates — a spoonful brightens tacos, grain bowls, and grilled meats.
- Rescue excess produce — use up that cucumber, radish, or carrot haul in a single jar.
- Are budget-friendly and fast — most jars are ready in 1–24 hours.
- Offer versatile flavor — you can go sweet, spicy, herbal, or Asian-inspired with simple swaps.
These pickles are especially handy for last-minute entertaining or when you want to add color and crunch to a weekday lunchbox.
Step-by-step overview
Before you dive into the ingredients, here’s what you’ll actually do:
- Prepare and cut vegetables to uniform thickness for even pickling.
- Make a hot brine of vinegar, water, salt, and optional sugar and spices.
- Pack vegetables tightly into clean jars with aromatics between layers.
- Pour hot brine over vegetables, leaving a little headspace.
- Cool, seal, and chill. Quick pickles are ready in as little as 1 hour but taste best after 24 hours.
This is a no-fuss, stovetop-to-fridge method; no pressure canning required unless you want shelf stability.
Key Ingredients
- Vegetables (about 1–1.5 lb total): cucumbers, carrots, radishes, red onions, bell peppers, green beans — sliced or cut to similar thickness.
- 1 cup white vinegar (5% acidity) — or rice or apple cider vinegar for different flavor.
- 1 cup water — equal parts vinegar and water is a reliable baseline.
- 1–2 tbsp pickling salt or kosher salt (no iodized table salt).
- 1 tbsp sugar (optional) — balances acidity; adjust to taste.
- Aromatics and spices: 1–2 garlic cloves, 1 tsp black peppercorns, 1 tsp mustard seeds, 1 bay leaf, optional red pepper flakes, dill sprigs, or coriander seeds.
- Sterilized jars with lids (pint jars work well).
Substitutions/notes: Use white vinegar for a neutral tang. Rice vinegar gives a milder, sweeter profile. If you want shelf-stable jars, follow a tested canning recipe and use proper water-bath processing rather than this quick refrigerate method.
Step-by-step instructions
- Wash and dry vegetables. Trim ends and slice uniformly — 1/8–1/4" for cucumbers and radishes, matchstick or coin slices for carrots.
- Layer aromatics (garlic, dill, peppercorns) into the bottom of clean jars.
- Pack vegetables tightly into jars, leaving about 1/2" headspace.
- In a small saucepan, combine vinegar, water, salt, and sugar. Heat until simmering and salt/sugar dissolve.
- Pour hot brine over the vegetables, pressing down to remove air pockets. Maintain 1/2" headspace.
- Wipe rims, seal with lids, and let cool to room temperature on the counter (about 30–60 minutes).
- Refrigerate. Taste after 1 hour; flavor improves over 24 hours and will peak within 2–3 days.
Short, clear steps help avoid common mistakes like under-salting or air pockets that trap moisture.
01Ingredients
Vegetables
Brine
Aromatics and spices
Jars
02Method
- Preparation
- Brine Making
- Cooling and Storing
Tap a step when it's done. The next one lights up.
0 OF 7 DONE03Recipe notes
- 01For long-term storage, follow a tested canning recipe and proper water-bath processing. Store sealed jars in the fridge for up to 2 months, but the best flavor is within 4–6 weeks.
How did it turn out?
No ratings yet. Tap a star to be the first.
Snap a photo and tag @recipe_smoke1 so I can see how yours came out.
Best ways to enjoy it
Quick pickles are remarkably versatile. Try them:
- On sandwiches and burgers for a sharp counterpoint to rich fillings.
- As a bright garnish for tacos, fish, or grilled meats.
- Tossed into grain bowls or potato salads for texture and tang.
- On a cheese board alongside salty cheeses and cured meats.
For a spicy bite at parties, serve them next to something creamy like an Alabama Fire Cracker Dip — the acidity cuts through heat beautifully.
Plating tip: serve a few different jars with small spoons so guests can sample multiple flavor profiles.
Storage and reheating tips
Refrigerator method: Store sealed jars in the fridge for up to 2 months. They’re safe to eat for longer, but flavor and crispness decline after 4–6 weeks.
Freezing: Not recommended — vegetables become mushy when thawed.
Shelf stability: Quick pickles made 1:1 vinegar:water are not reliably shelf-stable. For canning and long-term shelf storage, follow a USDA- or NCHFP-tested water-bath canning recipe.
Safe handling: Use clean utensils to remove pickles from jars to avoid introducing contaminants.
Label jars with the date so you know when they were made. If a jar smells off or shows mold, discard it.
Creative twists
- Asian style: use rice vinegar, a splash of soy sauce, thinly sliced ginger, and a pinch of sugar; add toasted sesame seeds before serving.
- Sweet-spicy: include honey or more sugar with Thai chilies and lime zest.
- Herbed lemon: add lemon slices, thyme, and whole grain mustard seeds for a bright, Mediterranean spin.
- Fermentation-adjacent: add a small amount of brine from a previous fermented batch to introduce probiotics (advanced; requires care).
- Low-acid veggies: blanch thick root vegetables first or increase vinegar fraction slightly for firmer crunch.
Swap vinegars, sweeteners, and spices to create vibrant regional variations.
Common questions
How soon can I eat quick pickles?
A: They’re technically edible after 1 hour, but flavor deepens after 24 hours and is best between 24–72 hours.
Can I can these for pantry storage?
A: Not with the basic quick-pickle brine shown here. If you want shelf-stable jars, use a tested water-bath canning recipe and follow USDA/NCHFP guidelines.
Will my vegetables stay crisp?
A: Some vegetables soften over time. Use fresh, firm produce, avoid overcooking, and consider a quick blanch-and-shock for carrots or green beans to improve long-term crispness.
Can I use flavored vinegar (like apple cider vinegar)?
A: Yes — flavored vinegars change the profile. Stick to vinegars with at least 5% acidity for safe pickling.
Is sugar necessary?
A: No — sugar balances acidity but can be omitted for savory or diet-sensitive versions.
Conclusion
Quick pickled vegetables are one of the easiest, most flexible pantry upgrades you can make—fast enough for weeknights, customizable for any cuisine, and economical when produce is abundant. For more ideas, check out Quick Pickled Vegetables – My Quiet Kitchen and my Pickled Vegetables.
 Salads
 Salads
 Salads
