Crispy Cheese Rolls
Warm and cheesy, these crispy cheese rolls are quick to make and perfect for parties or as a delightful snack. Ideal for sharing, they feature a crunchy exterior with melty cheese inside.

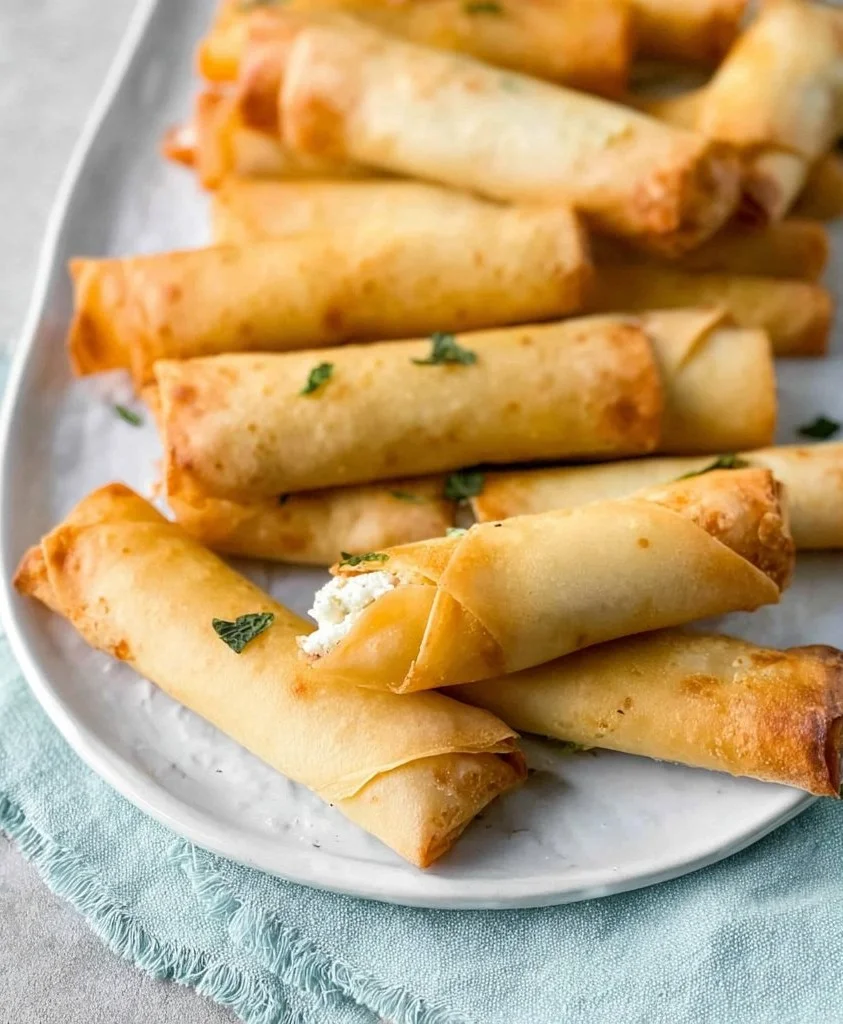
I make these Crispy Cheese Rolls whenever I need an easy crowd-pleaser — they’re cheesy, portable, and ready in minutes. The contrast between a paper-thin spring roll wrapper and molten cheese is pure comfort food, perfect for weeknight snacks, party platters, or as a crunchy starter when guests arrive. If you enjoy playful, handheld treats, you might also like this take on sweet handhelds like strawberry cheesecake cinnabon rolls for dessert after these savory bites.
Why you’ll love this dish
Simple ingredients, maximum payoff. These Crispy Cheese Rolls are quick to assemble, require no fancy equipment, and deliver that irresistible fried crisp with gooey cheese inside. They’re budget-friendly (cheese + wrappers = magic), kid-approved, and endlessly adaptable — make them for game day, a casual dinner, or to fill a party snack table.
Beyond taste, they’re great because:
- They come together fast: assembly and fry time are both short.
- They’re portable and shareable, ideal as party finger food.
- You can swap cheeses or fold in herbs/spices to suit any palate.
The cooking process explained
Before you pick ingredients, here’s what to expect: you mix a soft, melty cheese with a little seasoning, scoop the filling onto spring roll wrappers, roll them tight, and shallow-fry until they’re golden and crisp. The whole workflow is assembly → seal → fry → drain. I recommend having your wrappers covered with a damp towel while you work so they don’t dry out; frying is quick, so heat the oil while you roll the first few.
What you’ll need
- Spring roll wrappers (thawed if frozen)
- Cheese — mozzarella works well, or use a mix (cheddar for sharpness, a little cream cheese for creaminess)
- Fresh parsley (optional) finely chopped
- Salt and freshly ground black pepper
- Neutral oil for frying (vegetable, canola, or peanut)
Substitution notes:
- For a tangier bite, use part provolone or aged cheddar. For extra creaminess, add a spoonful of ricotta or cream cheese to the mix.
- Gluten-free wrappers are available if you need a gluten-free option.
If you like experimenting with stuffed pastry, try a savory version like these apple cheesecake tacos for inspiration on different fillings and shapes.
Step-by-step instructions
- Combine the filling: In a medium bowl, stir together shredded or cubed cheese, chopped parsley (if using), a pinch of salt, and a grind of black pepper. Keep the mixture tight — you don’t want watery bits.
- Prepare the wrappers: Lay one spring roll wrapper flat on a clean surface. Keep the rest covered with a damp towel to prevent drying.
- Fill and roll: Spoon about 1–2 teaspoons of the cheese mixture near one corner of the wrapper. Fold that corner over the filling, then fold in the sides and roll tightly toward the opposite corner. Seal the final edge with a dab of water.
- Heat the oil: Pour about 1/4–1/2 inch of oil into a heavy frying pan. Warm over medium heat until shimmering but not smoking. A small bit of wrapper should sizzle when dropped in.
- Fry until golden: Fry the rolls in batches, seam-side down first, turning so all sides become golden brown and crisp. This usually takes 1–2 minutes per side for small rolls.
- Drain and serve: Transfer to paper towels to drain excess oil. Serve immediately while the cheese is molten.
Chef note: If you’d rather bake them, brush lightly with oil and bake at 400°F (200°C) until golden — they’ll crisp but won’t be quite as bubbly inside. For a different pastry technique, see how folded cheese pastries are handled in an authentic Moroccan cheese pastry recipe.
01Ingredients
For the filling
For assembly
02Method
- Preparation
- Filling and Rolling
- Frying
- Serving
Tap a step when it's done. The next one lights up.
0 OF 9 DONE03Recipe notes
- 01For baking, brush lightly with oil and bake at 400°F (200°C) until golden. Store cooled rolls in an airtight container for up to 2 days in the fridge. Freeze un-fried rolls for up to 1 month.
How did it turn out?
No ratings yet. Tap a star to be the first.
Snap a photo and tag @recipe_smoke1 so I can see how yours came out.
Best ways to enjoy it
Serve fresh and hot for the perfect cheese pull. Plating ideas:
- On a wooden board with small bowls of dipping sauces: marinara, garlic aioli, or a spicy sriracha mayo.
- With a crisp salad to balance the richness (arugula dressed with lemon is ideal).
- As part of a mezze spread alongside pickles, olives, and fresh herbs.
For parties, stack them pyramid-style and garnish with extra parsley and a sprinkle of flaky sea salt.
Storage and reheating tips
Short-term: Store cooled rolls in an airtight container in the refrigerator for up to 2 days. Note: the wrappers lose crispness.
Reheating: Re-crisp in a 375°F (190°C) oven for 6–8 minutes or in a toaster oven until warmed through and crunchy. Avoid the microwave — it makes them soggy.
Freezing: Freeze un-fried, sealed rolls on a baking sheet until firm, then transfer to a freezer bag for up to 1 month. Fry from frozen, adding an extra minute or two to cook time. Always ensure the oil is hot enough so the exterior crisps before the cheese overheats.
Food safety: because these contain dairy, cool within two hours of cooking and refrigerate promptly to prevent bacterial growth.
Creative twists
- Herb & spice: add a pinch of smoked paprika, red pepper flakes, or za’atar to the cheese for more flavor.
- Stuffing variations: spinach and feta, sun-dried tomato with mozzarella, or jalapeño and pepper jack for heat.
- Coated crunch: roll the sealed rolls in panko before frying for extra texture.
- Vegetarian/vegan: use plant-based mozzarella and a vegan pastry wrapper.
- Baked option: brush with oil and bake for a lighter version — brush with melted butter for extra flavor if not avoiding dairy.
Helpful answers
How long does it take from start to finish?
A: About 20–30 minutes. Prep (10–15 minutes) and frying (10–15 minutes) depending on batch size.
Can I make these ahead and fry later?
A: Yes — assemble and refrigerate or freeze un-fried. Fry chilled rolls for best results; frozen can go straight into hot oil with slightly longer frying time.
What’s the best cheese for melting?
A: Fresh mozzarella, low-moisture mozzarella, provolone, or a blend with a bit of cheddar are excellent. Add cream cheese if you want extra creaminess.
Are they safe to fry in a small pan?
A: Yes, but avoid overcrowding. Fry in small batches and keep the oil at a steady medium temperature.
Conclusion
If you want a quick, crispy snack with a gooey center, this Crispy Cheese Rolls approach is a reliable winner — and it easily adapts to whatever cheeses or seasonings you have on hand. For another take on similar Lebanese-style cheese rolls, see this Rakakat (Lebanese crispy cheese rolls) recipe at Feel Good Foodie which explores traditional methods and fillings. You might also like my Keto Pepperoni Cheese Roll-Ups.
 Appetizer
 Appetizer
 Appetizer
