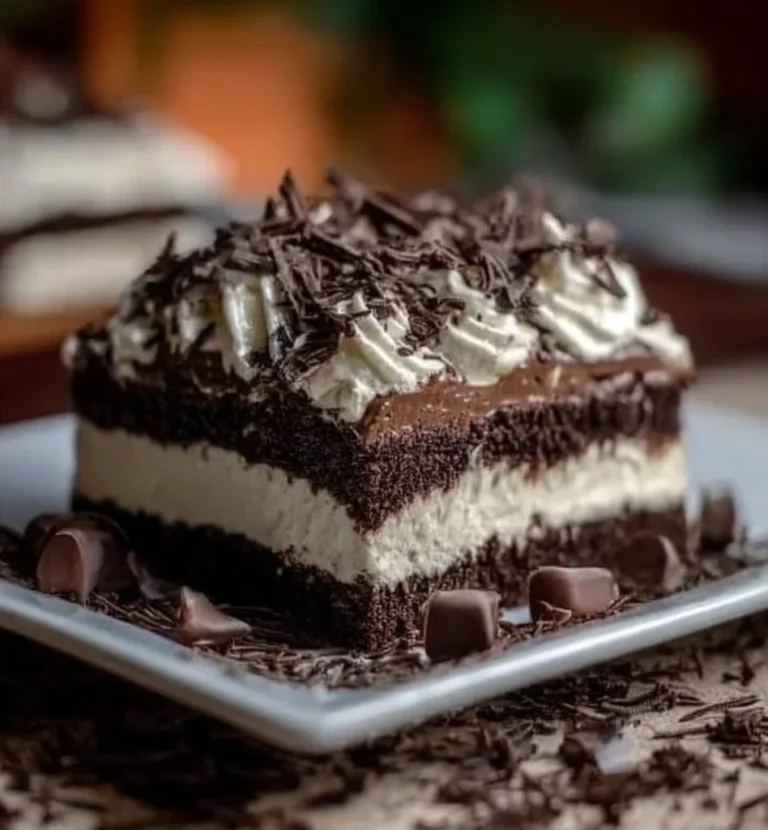
No Bake Chocolate Cheesecake
An easy and delightful no-bake chocolate cheesecake that's perfect for any occasion, bringing rich chocolatey goodness without the fuss of baking.

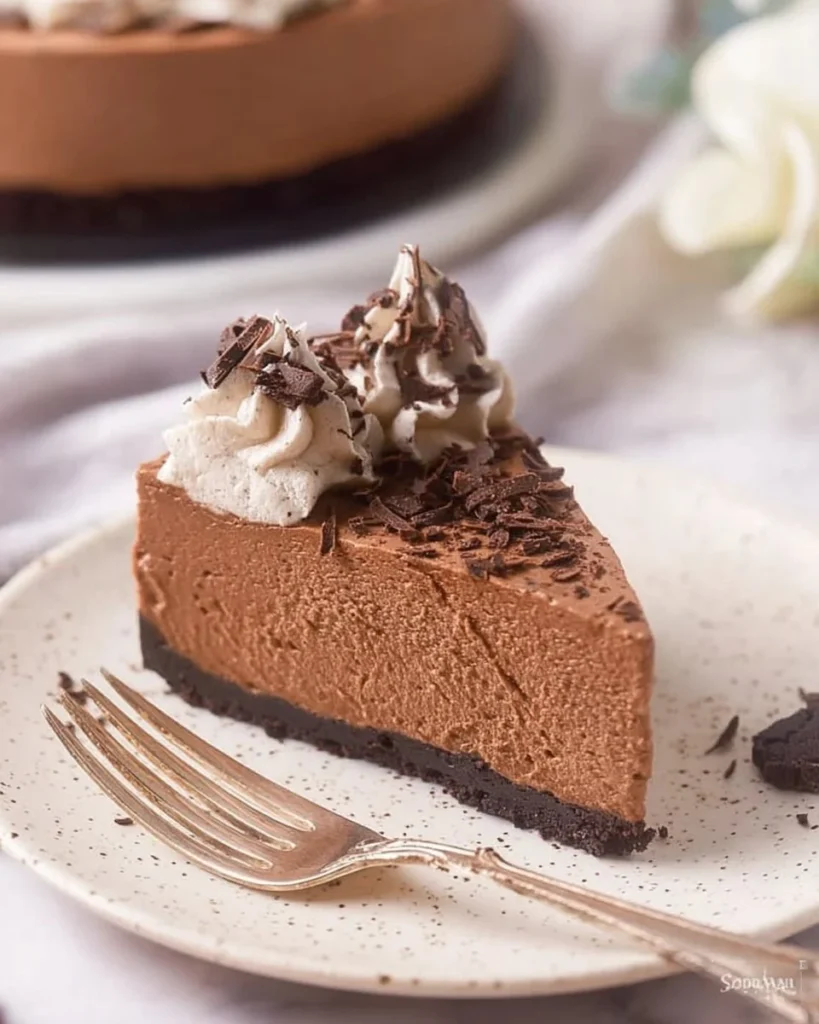
So, there I was, trying to whip up a quick dessert – you know, something to sweeten a rainy Saturday night when the little one had taken to art with leftover spaghetti sauce. Yep, that was MY life! Amidst the chaos, I stumbled upon this No Bake Chocolate Cheesecake recipe, and I thought, “What could go wrong?!” I mean, HOW can you mess up chocolate and cream cheese? Spoiler alert: I didn’t. The result? An UNREAL dessert that was SO GOOD, it turned our ordinary kitchen into a bustling bakery – if only for a moment. No baking, no fuss, just pure bliss! Let’s dive into this chocolatey goodness that’s perfect for your next family gathering or to satisfy that relentless sweet tooth.
Why You’ll Love This Recipe
- So Easy
- No baking here! Just mix, pour, and chill.
- Budget-Friendly
- A few simple ingredients and you’re golden.
- Freezer-Friendly
- Make ahead and save for later!
- Kid-Approved
- It’s chocolate, so obviously a hit with the kids.
- Crowd-Pleaser
- Bring it to your next potluck and bask in the compliments!
- Different Take
- This isn’t your typical cheesecake—it’s airy, rich, and chocolatey without the need for an oven.
Ingredients Needed and How to Make It
Ingredients Needed
- For the Base
- 2 cups chocolate cookie crumbs
- 1/2 cup unsalted butter, melted (softened so it mixes easily)
- For the Cheesecake Filling
- 16 oz cream cheese, softened
- 1 cup powdered sugar
- 1 cup sour cream
- 1/2 cup cocoa powder
- 1 teaspoon vanilla extract
- For Topping
- 1 cup heavy cream (dreamy texture!)
- Caramel sauce (heaping drizzles, please!)
- Extra chocolate (for those who can’t resist!)
- Fresh fruit or berries for a pop of color (optional, but I love it!)
How to Make This Recipe?
Step 1: Make the Crust
Grab a bowl and mix your chocolate cookie crumbs with that melted butter until it feels like wet sand. Now, press this mixture into the bottom of a 9-inch springform pan. You want a solid crust, so don’t be shy about getting your hands in there!
Step 2: Cream the Cheese
In a large mixing bowl, beat your softened cream cheese until it’s as smooth as a jazz playlist on a Sunday morning. Nothing chunky, folks, just creamy dreamy vibes!
Step 3: Add in the Good Stuff
Time to sweeten the deal! Gradually add your powdered sugar, sour cream, cocoa powder, and vanilla extract. Keep mixing until it’s all well combined. You should be smelling some serious chocolate magic happening!
Step 4: Whip It Real Good
In a separate bowl, whip your heavy cream until you hit those stiff peaks. If you’ve never done this before, just think of it as an arm workout—your cheesecake deserves it! Now, gently fold this whipped cream into your chocolate mixture. This is where the lightness comes in, so be careful not to deflate it.
Step 5: Spread It Out
Pour that luscious cheesecake filling over your prepared crust, spreading it evenly. This is getting serious; your taste buds are in for a treat!
Step 6: Chill Out
Pop the cheesecake in the fridge for a minimum of 4 hours, or until it’s set. It’s hard to wait, but trust me, it’ll be worth it.
Step 7: Top It Off
Before serving, drench your cheesecake with caramel sauce, sprinkle some extra chocolate on top, or throw some fresh fruit on there if you’re feeling fancy. You do you!
01Ingredients
For the Base
For the Cheesecake Filling
For Topping
02Method
- Preparation
Tap a step when it's done. The next one lights up.
0 OF 7 DONE03Recipe notes
- 01Store in the refrigerator for up to a week or freeze for up to three months. Thaw in the fridge overnight before serving. Consider adding espresso powder for a mocha flavor, or substitute for gluten-free cookies if needed.
How did it turn out?
No ratings yet. Tap a star to be the first.
Snap a photo and tag @recipe_smoke1 so I can see how yours came out.
How to Store It & Expert Tips
How to Store It
This cheesecake is a fridge hero! Keep it in the refrigerator for up to a week in an airtight container. Want to store it longer? You can freeze it for up to three months! Just thaw it in the fridge overnight before serving.
Expert Tips
- Sweet Spot
- If you like it sweeter, adjust the sugar in the cheesecake filling.
- Flavor Boost
- Add a splash of espresso powder to the cocoa mix for a mocha twist.
- Substitutions
- Got gluten-free needs? Swap the chocolate cookies for gluten-free ones, and you’re good to go!
- Presentation
- Don’t forget to make it pretty when you serve! A drizzle of caramel with some berries on the side always impresses!
Conclusion
And there you have it! A No Bake Chocolate Cheesecake that’s not just a recipe but a warm hug in dessert form. Trust me, this one works every time for family gatherings, kids’ parties, or even as a little treat to yourself after a long day. If you give it a shot, drop a star rating and a comment below—I’d love to hear how yours turned out! And hey, share it with your cousin who never shows up empty-handed. Did you add your own spin? I wanna hear it!
FAQ Section
Here’s the deal—how long does it take to chill?
You’ll want to pop this beauty in the fridge for at least 4 hours. Overnight is even better if you can wait that long.
Real talk—can I use low-fat cream cheese?
You sure can! Just know that it might change the texture slightly. The creaminess is what we’re after here.
If your sweet tooth isn’t done yet, my Chocolate Lava Cake is an easy win for a dinner party!
 Dessert
 Dessert
 Dessert
