Garlic Herb Dutch Oven Bread
A fragrant, no-knead loaf made with garlic and herbs, baked in a Dutch oven for a bakery-style crust and chewy interior.

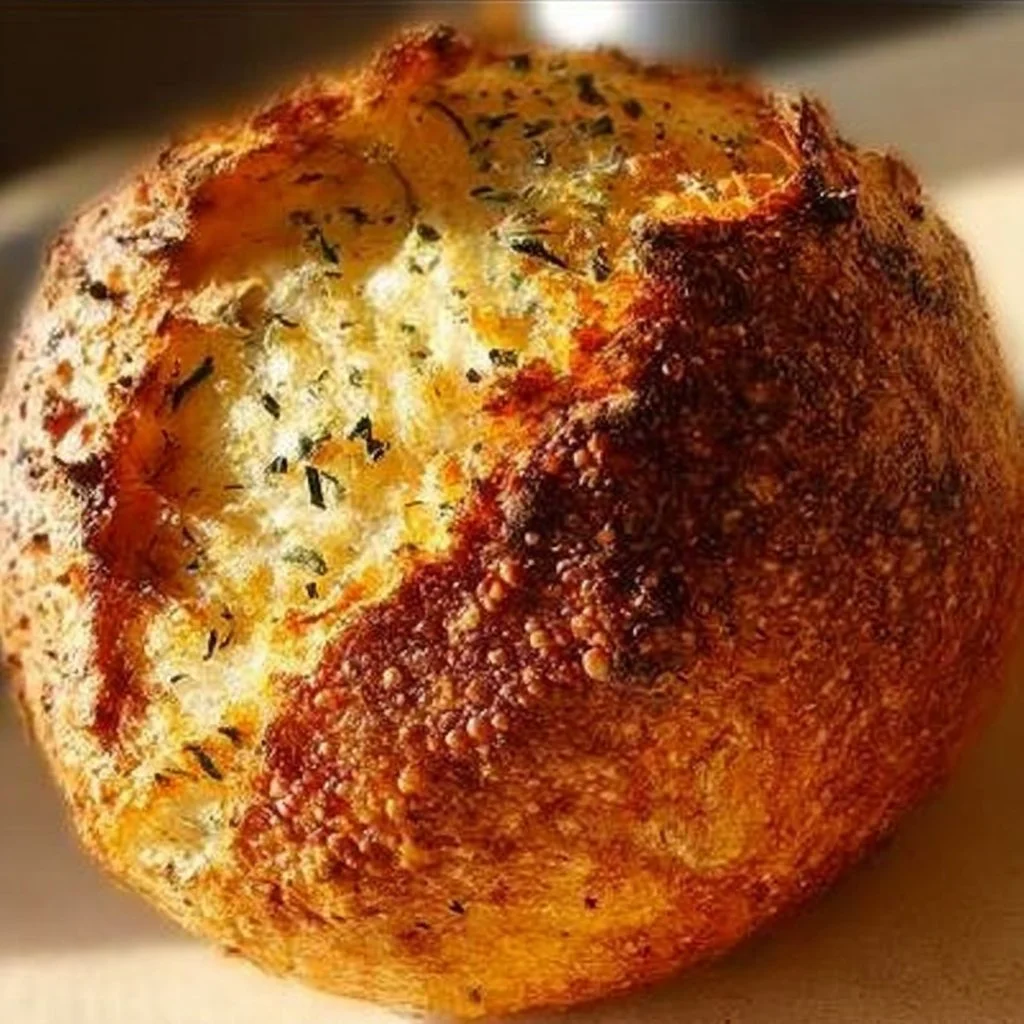
I’ve been baking this garlic herb Dutch oven loaf for years when I want a showy, fragrant bread without babysitting dough. It’s the kind of loaf that fills the house with garlic and herbs, crisps up into a blistered crust in a hot pot, and pairs with everything from soup to late-night snacking. If you like concentrated garlic flavor and rustic texture, this recipe delivers with minimal hands-on time — and it’s a great companion to recipes that spotlight garlic, such as a warm garlic bread dip I make on busy nights.
What makes this recipe special
This Dutch oven method gives you a bakery-style crust and an open, chewy crumb with almost no kneading. The long, slow rise develops flavor while the garlic and dried herbs infuse the dough throughout. It’s perfect for weekend brunches, cozy weeknights, or when you want a simple centerpiece that looks and smells impressive.
Reasons to try it:
- Low-effort, high-reward: mix, wait, shape, and bake. No intensive kneading required.
- Fragrant: garlic and rosemary (or thyme) are mixed into the dough so every bite has flavor.
- Versatile: serves as a sandwich base, alongside soups, or with olive oil for dipping.
The cooking process explained
Quick overview so you know what’s coming: mix flour, salt, yeast, garlic, and herbs; add warm water and let the dough ferment 12–18 hours until bubbly; shape and rest for an hour; bake in a preheated Dutch oven at 450°F for 30 minutes covered, then 15–20 minutes uncovered for a golden crust. Expect a sticky, shaggy dough that transforms into a crisp, aromatic loaf with a chewy interior.
What you’ll need
- 3 cups all-purpose flour
- 1 1/4 teaspoons salt
- 1/2 teaspoon instant yeast (or active dry — see notes below)
- 1 1/2 cups warm water
- 2 tablespoons olive oil (optional for flavor and softer crust)
- 2 cloves garlic, minced
- 1 tablespoon dried herbs (rosemary, thyme, or a mix)
- Cornmeal for dusting
Ingredient notes and substitutions:
- Instant yeast works straight into dry ingredients. If using active dry yeast, dissolve it in the warm water first and let sit 5–10 minutes until foamy.
- Fresh herbs can replace dried — use about 1 teaspoon chopped fresh herbs for every tablespoon of dried.
- Olive oil is optional but gives a slightly softer crumb and richer flavor.
Directions to follow
- In a large bowl, stir together the flour, salt, instant yeast, minced garlic, and dried herbs.
- Pour in the warm water and the olive oil. Mix with a spoon until a shaggy, sticky dough forms. Don’t worry about perfect kneading.
- Cover the bowl tightly with plastic wrap. Let the dough rise at room temperature 12–18 hours. The surface should show bubbles and the dough will look puffy.
- Turn the dough out onto a lightly floured surface. Fold it over itself a few times to build surface tension, then shape into a loose ball.
- Place the dough ball on floured parchment. Cover with a kitchen towel and let it rest for about 1 hour — it will puff slightly.
- Meanwhile, preheat your oven to 450°F (232°C) with a heavy Dutch oven (lid on) inside for 30 minutes so the pot is smoking hot.
- Sprinkle a little cornmeal into the hot Dutch oven to prevent sticking. Using the parchment for support, lower the dough into the pot.
- Cover with the lid and bake 30 minutes. This traps steam and creates that blistered crust.
- Remove the lid and bake another 15–20 minutes until the crust is deeply golden brown. If you like an even darker crust, add 2–3 more minutes but watch closely.
- Transfer the loaf to a wire rack and cool at least 30 minutes before slicing so the crumb sets.
Gather these items
- Large mixing bowl
- Wooden spoon or dough scraper
- Plastic wrap and kitchen towel
- Parchment paper
- Heavy Dutch oven with lid
- Wire cooling rack
Garlic Herb Dutch Oven Loaf
- Prep
- 13 HRS
- Cook
- 45 MIN
- Total
- 13 HRS 45 MIN
- Serves
- 8
01Ingredients
Dough Ingredients
02Method
- Preparation
- Shaping and Final Rise
- Baking
Tap a step when it's done. The next one lights up.
0 OF 10 DONE03Recipe notes
- 01Keep the loaf wrapped in a clean tea towel or paper bag for up to 2 days at room temperature. For longer storage, slice and freeze wrapped tightly. Freshness of yeast and herbs is crucial for flavor.
How did it turn out?
No ratings yet. Tap a star to be the first.
Snap a photo and tag @recipe_smoke1 so I can see how yours came out.
Best ways to enjoy it
Serve thick slices while the loaf is still warm. Great pairings:
- Drizzle with olive oil and sprinkle flaky salt for a simple appetizer.
- Tear and dunk into hearty soups or stews.
- Use as sandwich bread for roasted vegetables or slow-cooked meats.
For a garlic-forward meal, serve this loaf with a warm, cheesy dip; it complements dishes like chicken Alfredo garlic bread bowls especially well when you want a single-carve centerpiece.
How to store & freeze
Room temperature: keep the loaf wrapped in a clean tea towel or paper bag for up to 2 days to preserve crust texture. Avoid airtight plastic bags at room temp or the crust will soften.
Refrigeration: not recommended — it accelerates staling.
Freezing: slice the cooled loaf, wrap slices tightly in plastic wrap and foil, and freeze up to 3 months. Reheat frozen slices in a 350°F oven for 10–12 minutes or toast directly.
Reheating tip: spritz or brush slices with water and reheat in a 375°F oven for 5–7 minutes to revive the crust.
Food safety: always cool the loaf completely before wrapping to avoid condensation that promotes mold.
Flavor swaps
- Add 1/2 cup grated Parmesan and 1 teaspoon cracked black pepper for a cheesy crust.
- Try minced roasted garlic instead of raw for a sweeter, mellow garlic note.
- Make it olive-studded: fold in 1/2 cup chopped kalamata olives before the final rest.
- For a whole-grain twist, replace 1 cup of flour with whole-wheat flour and add an extra minute or two to baking time.
Your questions answered
Can I shorten the long rise time?
A: Yes — raise the room temperature slightly or increase yeast to 3/4–1 teaspoon for a faster 6–8 hour rise. Faster fermentation reduces depth of flavor.
What if I don’t have a Dutch oven?
A: Use a heavy covered casserole or a baking stone with a steam pan. Place a shallow pan of boiling water on the lower rack to create steam.
Can I use fresh garlic instead of dried?
A: You can — fresh garlic gives a punchier taste. Mince it fine so it incorporates evenly. If using roasted garlic, fold it in gently at shaping.
How do I know it’s done?
A: The crust should be deep golden-brown. For certainty, the internal temperature should be around 200–210°F (93–99°C).
Is this recipe suitable for beginners?
A: Absolutely. The method is forgiving — the long fermentation and hot pot do most of the work.
Conclusion
This garlic herb Dutch oven loaf is an easy way to produce bakery-like bread at home with fragrant garlic and herb notes and a satisfying crust. For more ideas, check out Easy Artisan Garlic Rosemary Bread from The Bewitchin’ Kitchen and my Easy Cheesy Bread with Keto Garlic Butter.
 Baking
 Baking
 Baking
