Cheeseburger Sliders
Enjoy cheesy, juicy sliders without the hassle of flipping multiple patties. Quick, budget-friendly, and kid-approved!

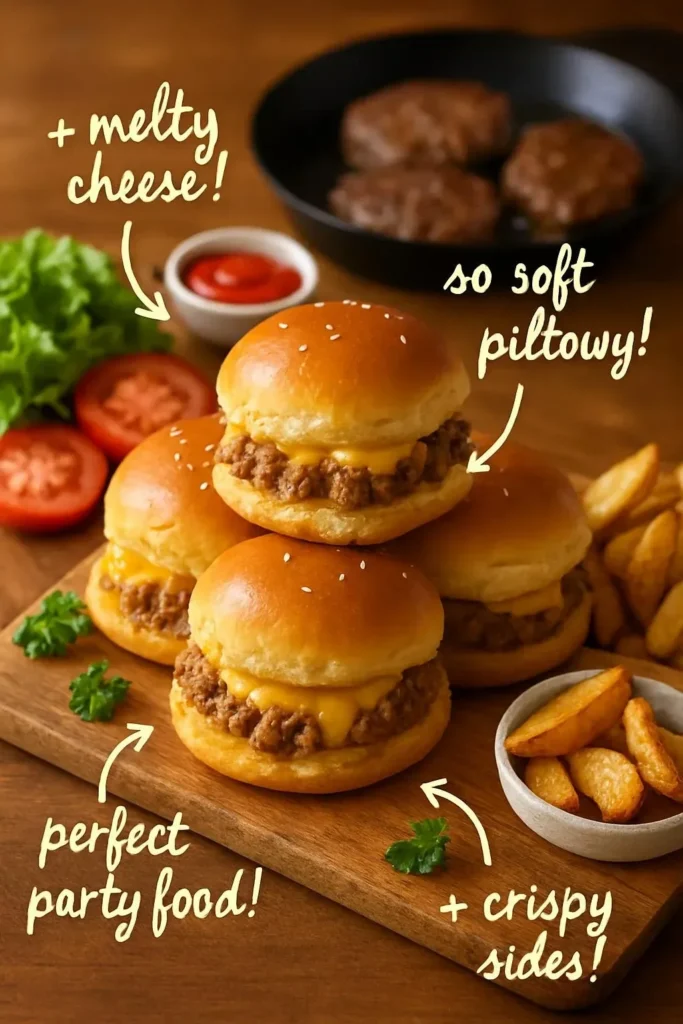
I first tried these cheeseburger sliders on a hectic weeknight when I needed something the whole family would eat—and fast. They bake as a single big patty, then slice into perfectly uniform mini burgers, which makes assembly and cleanup a breeze. If you like simple crowd-pleasers, this version delivers a cheesy, juicy slider with minimal hands-on time. For another quick slider angle, check out this cheeseburger sliders — 30-minute recipe that leans into speed and convenience.
Why you’ll love this dish
These baked cheeseburger sliders are perfect when you want classic burger flavor without flipping a dozen patties. They’re:
- Fast: Prep takes just a few minutes and the oven does the work.
- Budget-friendly: A single pound of beef makes several sliders, so it’s wallet-wise for families and parties.
- Kid-approved: The mild cheddar and ketchup-and-mustard finish hit familiar flavors kids enjoy.
- Easy to scale: Double the mixture for a larger crowd or use mini slider buns for parties.
Step-by-step overview
You’ll combine ground beef with cheese, onion, and seasonings, press it into a greased dish as one large patty, then bake until cooked through. After a short rest, cut into squares that fit slider buns, top with condiments, and serve warm. This one-pan method keeps hands-off time minimal and yields consistent, uniform sliders.
What you’ll need
- 1 lb ground beef (80/20 for best juiciness; leaner works but may be drier)
- 1/2 cup shredded cheddar cheese (sharp or mild, your choice)
- 1/4 cup diced onions (yellow or white; green onion works for milder flavor)
- 1 teaspoon garlic powder
- Salt and pepper to taste
- Slider buns (mini buns or small soft rolls)
- Ketchup and mustard for serving
Substitutions and notes:
- Cheese: Swap cheddar for Monterey Jack, pepper jack, or a melty American cheese for classic diner flavor.
- Onions: Use sautéed onions if you prefer them softened and sweeter.
- Seasoning: Add a teaspoon of Worcestershire sauce or 1/2 teaspoon onion powder for extra depth.
Step-by-step instructions
- Preheat the oven to 350°F (175°C).
- Grease a small baking dish (an 8×8-inch pan works well).
- In a bowl, combine the ground beef, shredded cheddar, diced onions, garlic powder, salt, and pepper. Mix gently—overworking can make the sliders tough.
- Press the mixture evenly into the prepared baking dish, creating a single, compact patty about 1–1.5 inches thick.
- Bake for 20–25 minutes, until the internal temperature reaches 160°F (71°C) and juices run clear.
- Let the meat rest 5 minutes; this helps it set and prevents crumbling.
- Cut the cooked patty into slider-sized squares to fit your buns.
- Place each square on a slider bun and top with ketchup and mustard as desired.
- Serve immediately while warm.
01Ingredients
Main Ingredients
For Serving
02Method
- Preparation
- Baking
- Assembly
Tap a step when it's done. The next one lights up.
0 OF 9 DONE03Recipe notes
- 01Store cooled slider pieces in an airtight container for up to 3 days. Microwave individual sliders for 20–30 seconds, or reheat in a 350°F oven for 8–10 minutes. For freezing, wrap individual cooked squares in plastic wrap and freeze for up to 2 months. Thaw overnight in the fridge and reheat as instructed.
How did it turn out?
No ratings yet. Tap a star to be the first.
Snap a photo and tag @recipe_smoke1 so I can see how yours came out.
Best ways to enjoy it
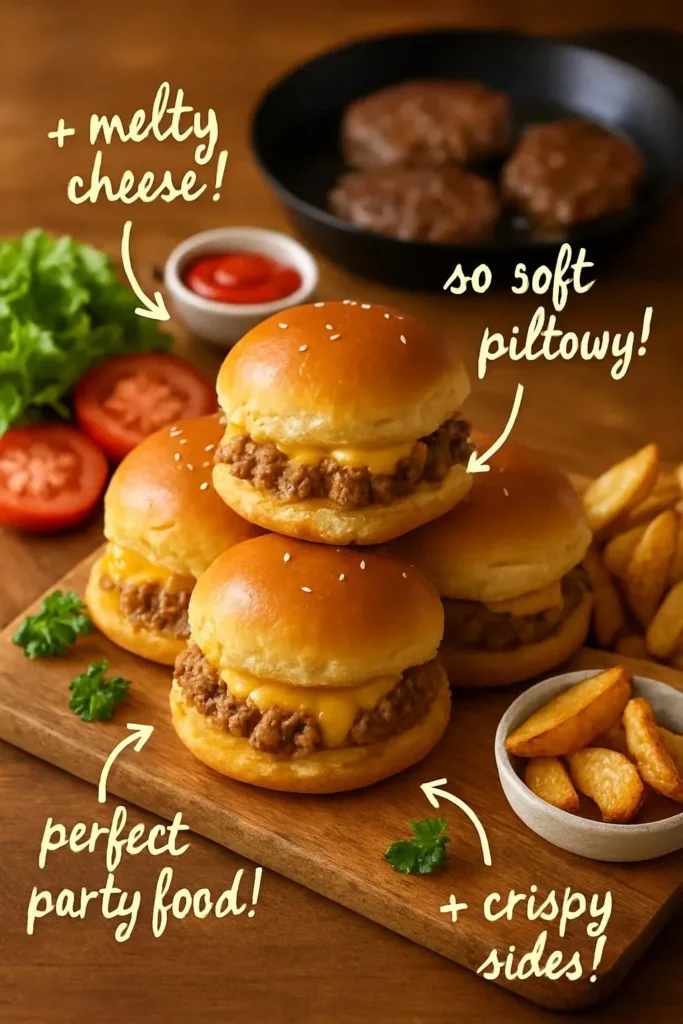
Plate sliders on a platter lined with parchment for parties. Pair with:
- Classic sides: oven fries, coleslaw, or pickle spears.
- Lighter sides: a simple mixed-green salad or crunchy carrot sticks.
- For game day: add a bowl of chili cheese dip or loaded nacho fries.
For a fancier presentation, top each slider with a pickle round, caramelized onions, or a small lettuce leaf. Serve toothpicks through each slider to keep them together when stacking on a party tray.
Storage and reheating tips
Refrigerate: Store cooled slider pieces in an airtight container for up to 3 days.
Reheat: Microwave individual sliders for 20–30 seconds, or reheat in a 350°F oven for 8–10 minutes until warmed through. Cover with foil to prevent drying.
Freeze: Wrap individual cooked squares in plastic wrap and freeze in a single layer in a freezer bag for up to 2 months. Thaw overnight in the fridge and reheat as above.
Food safety: Ground beef should reach 160°F (71°C) to be safe; use an instant-read thermometer to confirm doneness.
Creative twists
- Hawaiian-style: Use sweet slider rolls and add a teriyaki glaze for a bite of sweet-savory contrast.
- BBQ cheddar sliders: Mix in a tablespoon of BBQ sauce and top with crispy onion straws.
- Veg swap: Replace half the beef with cooked lentils or finely chopped mushrooms for a lighter, umami-rich version.
- Spicy kick: Stir in 1/4 teaspoon cayenne or top with pickled jalapeños and pepper jack cheese.
- Slider bar: Offer toppings like sliced pickles, crispy turkey bacon, sautéed mushrooms, and different cheeses so guests can customize.
Common questions
How long does this take from start to finish?
A: Plan about 30–35 minutes total: 5–10 minutes to mix and press the meat, 20–25 minutes baking, and a short rest before slicing.
Can I make these ahead for a party?
A: Yes. Bake, cool, and refrigerate the meat slab. Reheat in a low oven covered with foil (around 300°F) until warmed through, then slice and assemble just before serving.
Can I use ground turkey or chicken instead of beef?
A: You can, but poultry yields a drier result. Add a tablespoon of olive oil or an egg to help retain moisture, and ensure the internal temperature reaches 165°F (74°C).
What size baking dish is best?
A: An 8×8-inch or similar small baking dish keeps the patty thick enough for juicy sliders. A larger dish will spread the meat thinner and shorten baking time.
Are these safe for kids and picky eaters?
A: Absolutely—simple seasoning and familiar condiments make them accessible for kids. You can also omit the onion or finely grate it to reduce texture issues.
Conclusion
If you want a fast, family-friendly slider that’s easy to prep and pleasing to crowds, this baked cheeseburger slider method is a dependable go-to. For more ideas, check out Natasha’s Kitchen cheeseburger sliders and my Hawaiian Roll Cheeseburger Sliders.
 Appetizer
 Appetizer
 Appetizer
