Cheeseburger Sliders (Easy, 30-min Recipe)
Quick and easy cheeseburger sliders made with seasoned beef, melty cheddar, and soft dinner rolls, perfect for weeknight dinners or parties.

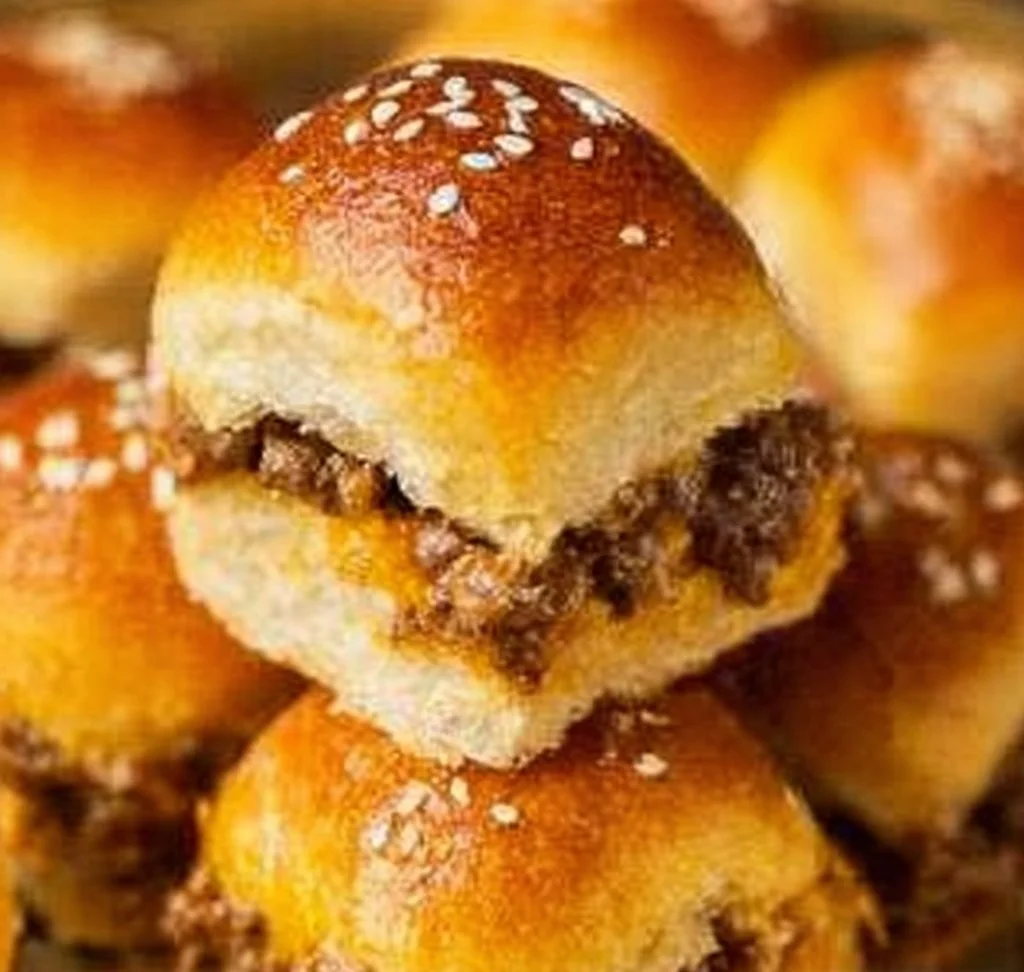
I make these cheeseburger sliders whenever I need a no-fuss crowd-pleaser that comes together faster than ordering takeout. In about 30 minutes you get melty cheddar, seasoned beef, and soft dinner rolls — perfect for weeknight dinners, game day spreads, or an easy potluck contribution. If you want a quick sweet finish after sliders, try this 30-minute chocolate cake for two for a tiny, fast dessert that keeps the meal stress-free.
Why you’ll love this dish
These sliders hit comfort-food goals without the usual faff. They’re fast (30 minutes start to finish), budget-friendly (2 lb of lean ground beef feeds a crowd), and kid-approved. The assembly is forgiving: cooked, seasoned beef stirred with mayo keeps the filling moist; layering sliced and shredded cheddar guarantees that gooey cheese pull; and baking the assembled sliders crisps the tops while melting the cheese.
When to make them:
- Weeknight dinners when you want something quick and filling.
- Parties and game days where grab-and-go food matters.
- Potlucks or casual holiday side tables — they travel well and can be reheated.
The cooking process explained
Quick overview so you know what to expect: sauté onions and beef, season, mix in mayo, assemble the sliders on buttered rolls layered with cheese, brush tops with butter and sesame seeds, then bake until the tops are golden and the cheese is melted. Minimal hands-on time and almost all active steps happen on the stovetop before a short bake.
What you’ll need
- 2 lb lean ground beef (90/10 or 93/7) — leans melt less fat but stay juicy with the mayo.
- 1/2 Tbsp olive oil — to soften the onions and prevent sticking.
- 1 tsp salt
- 1 tsp black pepper
- 1 tsp garlic powder
- 1/2 large yellow onion, finely diced — adds sweetness and texture.
- 1/4 cup mayonnaise — binds the beef and keeps it moist (sour cream or plain Greek yogurt can substitute).
- 8 slices medium cheddar cheese — for a solid melted layer between bun and beef (or use more sliced cheese if you prefer).
- 6 oz medium cheddar, shredded — adds loose, melty coverage over the beef.
- 24 dinner rolls (two packs of 12 work well) — classic slider rolls or potato rolls both work.
- 2 Tbsp unsalted butter, melted (plus more butter to grease the baking sheet)
- 1 Tbsp sesame seeds — optional, for a bakery-style finish.
Notes: If you want a lower-sodium option, use low-salt mayonnaise and reduce the added salt by half, then taste before baking.
Step-by-step instructions
- Preheat the oven to 350˚F. Butter the bottom of a rimmed baking sheet so rolls don’t stick.
- Heat a large skillet over medium-high and add 1/2 Tbsp olive oil. Add the diced onion and sauté until slightly translucent, about 2 minutes.
- Add the 2 lb ground beef to the skillet. Break it up with a spatula and season with 1 tsp salt, 1 tsp black pepper, and 1 tsp garlic powder. Cook over medium-high just until no pink remains, stirring occasionally to crumble. Remove from heat.
- Tilt the skillet and spoon off any excess fat. Return the pan to a cool burner briefly if needed, then stir 1/4 cup mayonnaise into the cooked beef until evenly combined. This keeps the filling juicy and spreadable.
- Slice the buns in half horizontally. Place the bottom halves on the buttered baking sheet in a single layer.
- Line the cut sides of the bottom buns with the 8 slices of cheddar. Spread the beef mixture evenly over the sliced cheese, using a spatula to square off edges so the filling reaches the bun edges.
- Sprinkle the 6 oz shredded cheddar evenly over the beef. Top with the bun tops, cut-side down.
- Brush the tops with 2 Tbsp melted butter and immediately sprinkle sesame seeds over them.
- Bake at 350˚F for 12–15 minutes, until the cheese is melted and the tops are golden brown. Remove from oven, slice between buns if not already separated, and serve warm.
Ingredients (quick checklist)
- 2 lb lean ground beef (90/10 or 93/7)
- 1/2 Tbsp olive oil
- 1 tsp salt
- 1 tsp black pepper
- 1 tsp garlic powder
- 1/2 large yellow onion, finely diced
- 1/4 cup mayonnaise (or Greek yogurt)
- 8 slices medium cheddar cheese
- 6 oz medium cheddar, shredded
- 24 dinner rolls (2 packs of 12)
- 2 Tbsp unsalted butter, melted (plus extra for pan)
- 1 Tbsp sesame seeds (optional)
01Ingredients
Main Ingredients
02Method
- Preparation
Tap a step when it's done. The next one lights up.
0 OF 9 DONE03Recipe notes
- 01If you want a lower-sodium option, use low-salt mayonnaise and reduce the added salt by half, then taste before baking.
How did it turn out?
No ratings yet. Tap a star to be the first.
Snap a photo and tag @recipe_smoke1 so I can see how yours came out.
Best ways to enjoy it
Serve these sliders hot and straight from the pan for the best cheese pull. Pairing ideas:
- Crisp oven fries or sweet potato wedges for a classic combo.
- A simple green salad with vinaigrette for balance.
- Pickle slices, ketchup, mustard, and extra mayo on the side for build-your-own sliders.
For a heartier spread at a party, serve alongside something unexpected like turkey bacon cheeseburger pasta to double down on the cheeseburger flavors.
Plating tip: Arrange sliders in a row on a long platter, garnish with chopped chives or pickles for color, and provide small ramekins of condiments.
How to store & freeze
Refrigerator: Cool completely, then store sliders in an airtight container for up to 3 days. Reheat in a 350˚F oven for 10–12 minutes (covered with foil for the first half to prevent over-browning), or microwave individual sliders for 45–60 seconds.
Freezer: Assemble and freeze unbaked on the baking sheet until firm, then transfer to a freezer bag for up to 2 months. Bake from frozen at 375˚F for 18–22 minutes, checking for golden tops and melted cheese.
Food safety: Reheat leftovers to an internal temperature of 165˚F before serving.
Flavor swaps
- BBQ sliders: Stir 1/3 cup BBQ sauce into the cooked beef and omit mayo. Top with crispy onions.
- Tex‑Mex: Add 1 tsp chili powder and a pinch of cumin to the beef. Swap cheddar for pepper jack and top with pickled jalapeños.
- Turkey sliders: Use ground turkey and add an extra tablespoon of mayo or 1 Tbsp olive oil to preserve moisture.
- Vegetarian: Swap cooked seasoned lentils or chopped mushrooms for beef and finish the same way with cheese.
Your questions answered
Can I make these ahead of time?
A: Yes. Assemble up to the point of adding the top buns, cover tightly, and refrigerate for a few hours. Brush with butter and bake when ready. For longer storage, freeze as described above.
Can I use larger buns or burger buns?
A: Yes, but you’ll change the serving count. If you use larger buns, adjust quantities and bake time slightly until the cheese melts and tops brown.
Is the mayo necessary?
A: It’s recommended — mayo keeps the beef moist and gives a subtle richness. For a lighter option, use plain Greek yogurt.
Can I swap cheeses?
A: Absolutely. American cheese or Swiss melts well; a sharper cheddar will give more bite.
How can I make them less greasy?
A: Use lean ground beef and spoon off excess fat after cooking. Also avoid adding extra oil to the beef once drained.
Conclusion
These cheeseburger sliders are a fast, dependable recipe for feeding a group or making a weeknight meal feel special. For another quick slider riff and step-by-step photos, check out the detailed take on sliders at Natasha’s Kitchen cheeseburger slider recipe. For another idea, try my Cheeseburger Sliders.
 Crockpot & Slow Cooker
 Crockpot & Slow Cooker
 Dinner Bowls
