Irresistible Easy Grilled Cheese Burrito You’ll Crave Again
This grilled cheese burrito combines the comfort of a classic burrito and the crunch of toasted cheese, making it a perfect weeknight indulgence.

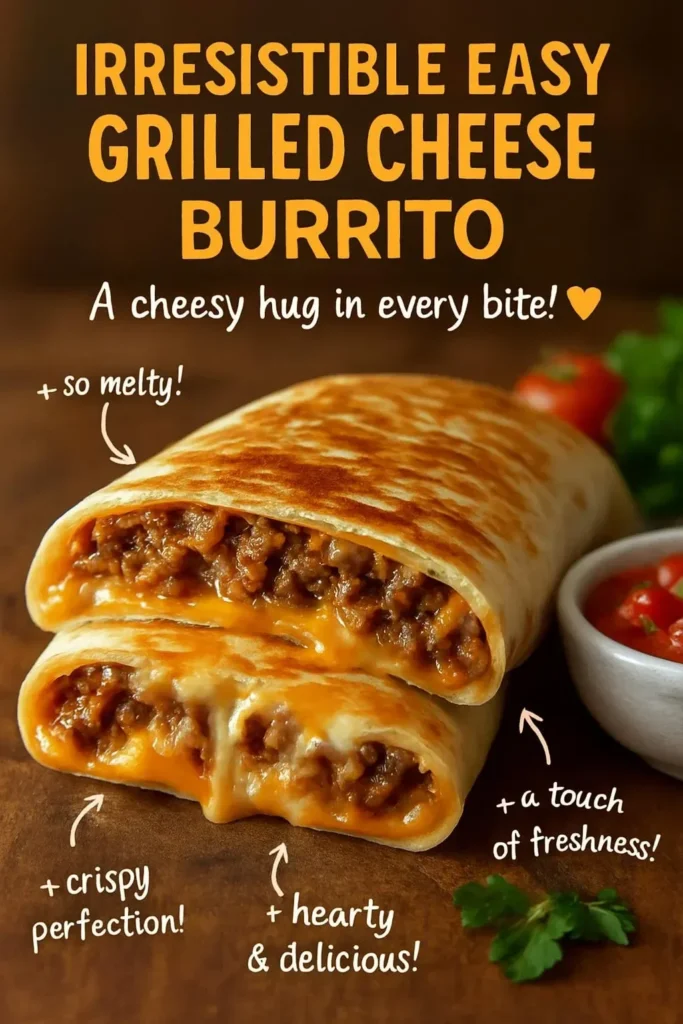
I still remember the first time I wrapped up this grilled cheese burrito — the crunch of the toasted tortilla, the molten ribbon of nacho sauce and cheddar, and that little hit of chipotle heat. It’s the kind of weeknight dish that feels indulgent but takes under 30 minutes to pull together. If you want a version with extra photos and another take on folding the burrito, check out this grilled cheese burrito variations post while you read — it shows a few helpful tricks I often use.
What makes this recipe special
Why make this recipe? Because it combines two comfort-food classics — a burrito’s filling and a grilled cheese’s toasty exterior — into one handheld, craveable meal. It’s perfect for busy weeknights, game-day snacks, or when picky eaters need a win. The recipe is flexible: swap beef for turkey or a plant-based alternative, choose whole wheat or gluten-free tortillas, and adjust the heat with chipotle sauce.
How this recipe comes together
Step-by-step overview: You’ll brown and season the ground beef, fold it with cooked rice and creamy cheeses into large tortillas, then griddle each burrito in butter until the outside is golden and the fillings are melted. Expect about 20–30 minutes active time from start to finish. This short roadmap helps set expectations: cook meat → mix with rice and sauces → assemble → griddle to finish.
Gather these items
What you’ll need (with swaps and quick notes):
- 1 pound ground beef — substitute ground turkey, chicken, or a plant-based crumble.
- 1 packet taco seasoning — or make your own blend of chili powder, cumin, garlic powder, and paprika for less sodium.
- 2 cups cooked white rice — use brown rice or quinoa for more fiber; leftover rice works great.
- 1 cup sour cream — plain yogurt or a dairy-free sour cream are fine.
- 1 cup nacho cheese sauce — store-bought, homemade, or vegan cheese alternative.
- 1 cup shredded cheddar cheese — try a Mexican blend or mix in sharp cheddar for bite.
- 1 cup shredded mozzarella cheese — gives gooey pull; omit for lower fat.
- 1 tablespoon chipotle sauce — adjust to taste or swap with sriracha.
- 4 large flour tortillas — whole wheat or gluten-free works; large burrito-size is key.
- 2 tablespoons butter or oil — olive oil or non-stick spray for a lighter finish.
For more folding and grilling inspiration, you can compare techniques like those shown on this classic grilled cheese burrito page.
Cooking method
Step-by-step instructions:
- Heat a skillet over medium-high heat. Add the ground beef and crumble as it cooks.
- When the beef is nearly cooked through, sprinkle in the taco seasoning and a splash (about 1/4 cup) of water; stir and simmer until the seasoning coats the meat and liquid reduces. (Food safety: cook ground beef to 160°F/71°C.)
- Stir the cooked rice into the seasoned beef until evenly distributed. Remove the pan from heat.
- In a bowl, combine sour cream and chipotle sauce; adjust the chipotle to your spice tolerance.
- Lay one tortilla flat. Spoon a quarter of the beef-and-rice mixture down the center. Add a few spoonfuls of nacho cheese sauce, then sprinkle with equal parts cheddar and mozzarella.
- Fold the sides of the tortilla in, then roll it tight from the bottom to form a burrito. Repeat with remaining tortillas and filling.
- Heat a clean skillet or griddle over medium. Add 1/2 tablespoon butter or oil and swirl to coat.
- Place a burrito seam-side down on the hot surface. Cook 2–3 minutes per side until the tortilla is golden brown and the cheeses are melted, adding more butter between batches if needed.
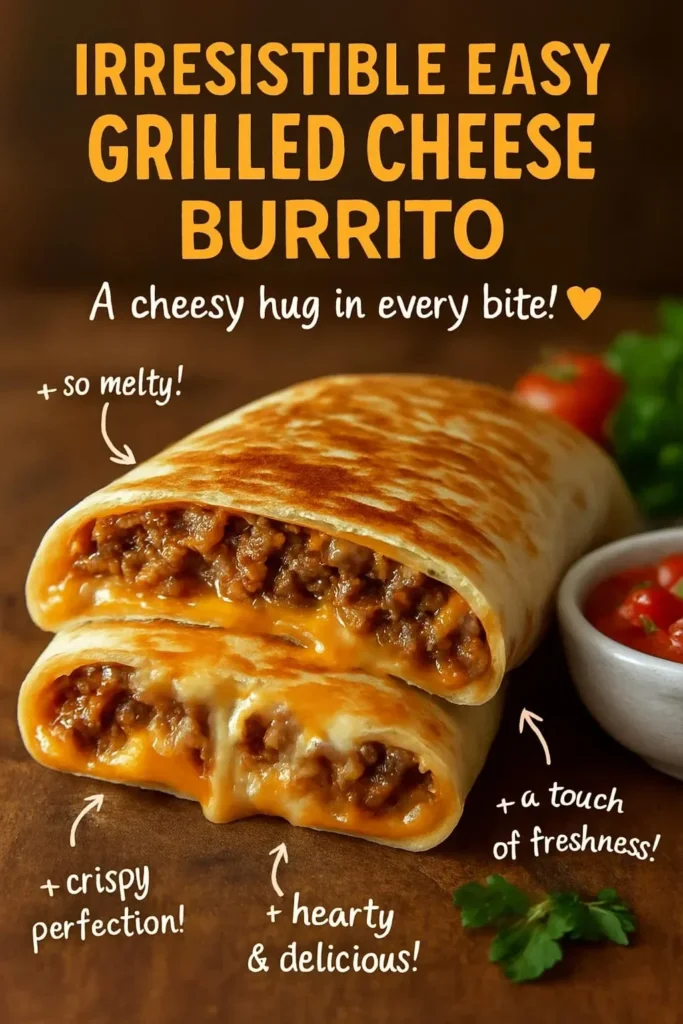
- Remove and let rest 1 minute. Slice in half and serve hot.
01Ingredients
For the Burrito Filling
02Method
- Cooking
Tap a step when it's done. The next one lights up.
0 OF 9 DONE03Recipe notes
- 01Cut each burrito on the diagonal and arrange on a platter for sharing. Serve with a simple side salad or crunchy tortilla chips. Pair with a bright drink like iced tea or a citrusy alcohol-free beer.
How did it turn out?
No ratings yet. Tap a star to be the first.
Snap a photo and tag @recipe_smoke1 so I can see how yours came out.
Best ways to enjoy it
Serving suggestions:
- Cut each burrito on the diagonal and arrange on a platter for sharing.
- Serve with a simple side salad or crunchy tortilla chips.
- For dips: extra nacho cheese, salsa verde, or a lime crema (lime zest + sour cream) complement the flavors.
- Pair with a bright drink like iced tea or a citrusy soda to cut through the richness.
Storage and reheating tips
How to store & freeze:
Refrigerate: Place cooled burritos in an airtight container or wrap tightly in foil/plastic. Keep in the fridge for up to 3–4 days.
Freeze: Wrap each burrito in foil and then place in a freezer bag. Freeze up to 2 months. Thaw overnight in the fridge before reheating.
Reheating: Oven (preferred) — unwrap and place on a baking sheet at 350°F (175°C) for 15–20 minutes until heated through. Stovetop — reheat in a skillet over low-medium heat, covered, flipping once. Microwave — zap 1–2 minutes, then crisp in a skillet for 1–2 minutes per side to restore texture.
Safety note: Reheat to an internal temperature of 165°F (74°C) for safe consumption.
Flavor swaps
Creative twists to try:
- Breakfast version: Swap beef for breakfast sausage, add scrambled eggs and hash browns, and use pepper jack for a kick.
- Veggie-forward: Replace meat with seasoned sautéed mushrooms, black beans, or roasted cauliflower.
- Low-carb: Use large iceberg lettuce leaves or low-carb tortillas; skip the rice or use cauliflower rice.
- Smoky-sweet: Add pickled red onions and a drizzle of honey for a sweet-spicy contrast.
- Regional spin: Add roasted poblanos, cotija cheese, and salsa verde for a more Mexican-inspired profile.
Helpful answers
How long does this take from start to finish?
A: Active time is about 20–30 minutes if you have cooked rice ready. If you need to cook rice from scratch, add 15–20 minutes.
Can I make these ahead for a party?
A: Yes. Assemble burritos and refrigerate up to one day before griddling. For large batches, cook, cool, wrap, and freeze; reheat as directed in the storage section.
What’s a good substitute for nacho cheese sauce?
A: Melted shredded cheddar combined with a splash of milk and a pinch of cornstarch makes a quick cheese sauce. Vegan cheese sauce or salsa mixed with extra shredded cheese also works.
How do I prevent a soggy tortilla?
A: Use hot fillings (not steaming-with-water) and toast the tortilla well in butter to create a barrier. Slightly under-moistening the rice helps too.
Is this safe for kids?
A: Yes — omit or reduce chipotle sauce for kid-friendly heat levels. Cut into small portions for younger kids.
Conclusion
This grilled cheese burrito is a fast, flexible comfort meal that rewards simple technique: good browning, balanced fillings, and patient melting. For an exploration of how heat transforms ingredients and layers flavor — something that elevates this burrito’s roasted and melty components — read Tomatillos and the Flavor Maximizing Power of Heat.
 Crockpot & Slow Cooker
 Dinner Bowls
 Casseroles
