Oyakodon Chicken and Egg Rice Bowl
Oyakodon is a comforting Japanese rice bowl featuring tender chicken, silky eggs, and flavorful broth, perfect for quick weeknight dinners.

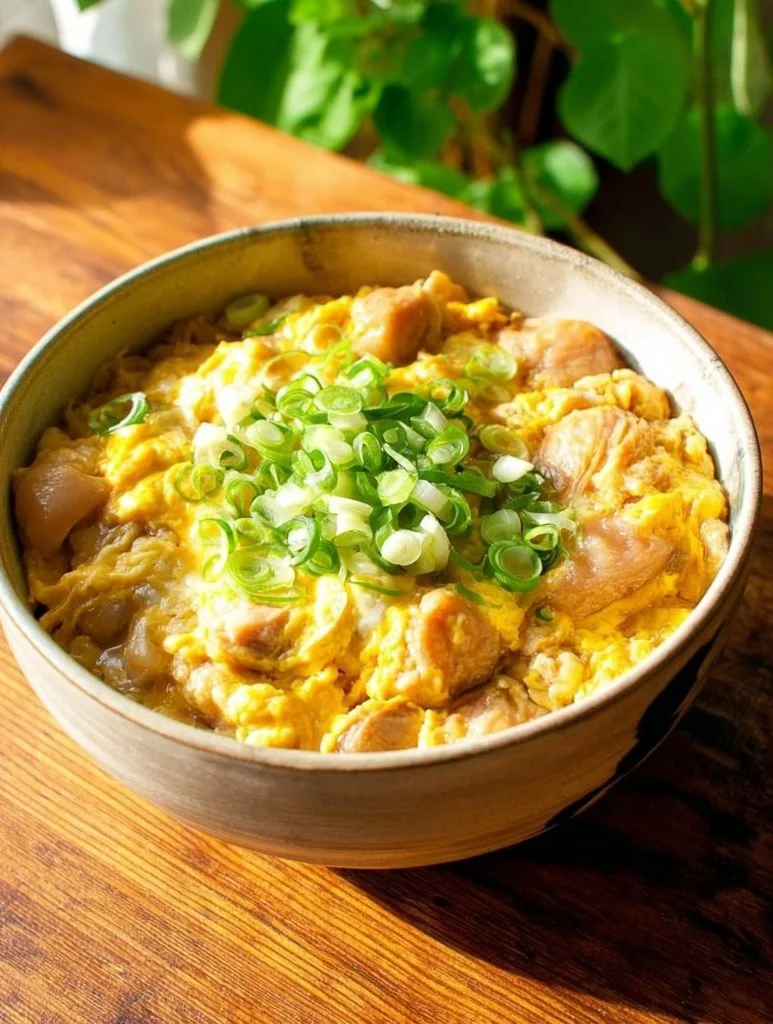
Oyakodon is one of those meals that feels like a warm hug in a bowl: tender chicken simmered in a savory-sweet broth, silky softly set eggs, and steaming rice to soak up every drop. I turn to this recipe when I want a fast, satisfying weeknight dinner that still tastes like something special — it’s comforting, homely, and remarkably simple to make.
Why you’ll love this dish
This dish is quick to pull together, budget-friendly, and packs big flavor with just a few pantry staples. Oyakodon (literally “parent and child” — chicken and egg) is a classic Japanese donburi that works for solo dinners, family meals, or when you need a no-fuss dish that still looks and tastes like you cared. It’s also a great way to make rice more exciting and to use up leftover rice.
What makes it special: the eggs are poured over simmering chicken and broth and steamed until just set, giving a custardy texture that’s soft but still distinct — not scrambled, not runny, just delicate.
The cooking process explained
Quick overview of the method so you know what to expect:
- Soften onion in a seasoned broth (dashi or chicken broth) flavored with soy and alcohol-free mirin.
- Add thinly sliced chicken and simmer until cooked through.
- Pour beaten eggs over the hot mixture and cover briefly so the eggs gently steam and set.
- Serve the resulting chicken-and-egg mixture over warm rice and garnish.
This recipe is essentially a short braise followed by gentle steaming of the eggs. Timing and heat control are the keys to keeping the eggs tender and the chicken juicy.
What you’ll need
- 2 cups cooked rice (short-grain Japanese rice preferred; substitute jasmine or medium-grain if needed)
- 1 lb chicken thighs, thinly sliced (boneless, skinless recommended for even cooking)
- 4 eggs
- 1 onion, thinly sliced
- 1/4 cup soy sauce (use low-sodium if preferred)
- 1/4 cup alcohol-free mirin (can substitute 1 tbsp sugar + 3 tbsp dashi or omit if you prefer less sweet)
- 1/2 cup dashi broth (or chicken broth as an easy substitute)
- Salt and pepper to taste
- Green onions for garnish, chopped
Notes: Use thigh meat for juiciness; breast will work but can dry out if overcooked. Dashi gives the most authentic umami — instant dashi powder dissolved in water works fine.
Step-by-step instructions
- Heat the broth: In a medium pan over medium heat, warm the 1/2 cup dashi (or chicken broth). Add the soy sauce, alcohol-free mirin, and sliced onion.
- Soften the onion: Simmer until the onion becomes soft and translucent, about 4–6 minutes. Taste and adjust seasoning with a pinch of salt or a splash more soy if needed.
- Cook the chicken: Add the sliced chicken thighs in an even layer. Simmer gently until the chicken is cooked through, about 5–7 minutes depending on thickness. Keep the liquid at a gentle simmer, not a rolling boil.
- Beat the eggs: While the chicken finishes, beat the 4 eggs lightly in a bowl. You want them mixed but not foamy. Season very lightly with a pinch of salt and pepper if you like.
- Add the eggs: Pour the beaten eggs evenly over the chicken and broth. Immediately cover the pan with a lid. Turn the heat to low and let the eggs steam until just set — about 1–2 minutes for custardy eggs. Avoid overcooking; they should still be slightly glossy.
- Plate: Spoon warm rice into bowls. Gently slide or scoop the chicken-and-egg mixture over the rice so the sauce soaks through.
- Garnish: Sprinkle chopped green onions on top and serve immediately.
Short, decisive actions and gentle heat make the difference between silky eggs and rubbery curds.
01Ingredients
Main Ingredients
02Method
- Preparation
Tap a step when it's done. The next one lights up.
0 OF 7 DONE03Recipe notes
- 01Use thigh meat for juiciness; breast will work but can dry out if overcooked. For best texture, consume oyakodon hot when the eggs are still tender.
How did it turn out?
No ratings yet. Tap a star to be the first.
Snap a photo and tag @recipe_smoke1 so I can see how yours came out.
Best ways to enjoy it
- Plate in shallow donburi bowls so the sauce distributes evenly over the rice.
- Pair with a simple side of pickled vegetables (tsukemono) or cucumber sunomono to cut the richness.
- A small bowl of miso soup and steamed edamame make this a satisfying Japanese-style meal.
- For a full bento-style spread, add steamed greens (spinach goma-ae) or a handful of shredded cabbage with a light dressing.
Serve immediately — oyakodon is best hot when the eggs are still tender.
Storage and reheating tips
Refrigerate leftovers in an airtight container within two hours of cooking. Consume within 2 days.
Reheat gently: reheat the chicken-and-egg mixture in a covered skillet over low heat, adding a tablespoon of water or broth to recreate steam and prevent drying. Heat until warmed through. Reheat rice separately or sprinkle with a little water and microwave covered for 45–60 seconds.
Freezing not recommended for best texture: eggs tend to change texture when frozen and thawed. If you must freeze, separate chicken (without eggs) and freeze up to 1 month, then add fresh eggs when reheating.
Food safety: ensure chicken reaches 165°F (74°C) through cooking. Cool leftovers quickly and store in the refrigerator.
Creative twists
- Miso Oyakodon: replace 1–2 tbsp of the soy sauce with miso paste dissolved in the broth for a richer umami.
- Mushroom Oyakodon: add shiitake or enoki mushrooms along with the onion for an earthy version (good for partial vegetarian swaps if you use tofu instead of chicken).
- Spicy: add a little shichimi togarashi or thinly sliced shishito peppers on top for heat.
- Chicken breast swap: use thinly pounded chicken breast for a leaner bowl; reduce simmer time to avoid drying.
- Vegan-ish: substitute firm tofu cubes for chicken and use a kombu-based dashi with a vegan alcohol-free mirin for a plant-based take. Finish with sliced scallions and a pinch of toasted nori.
Common questions
How long does this take from start to finish?
A: About 20–25 minutes if you have cooked rice ready. Most time is simmering the onion and cooking the chicken.
Can I use leftover cooked chicken?
A: Yes. Add diced leftover chicken near the end to warm through before pouring the eggs. Reduce simmering so the chicken doesn’t dry out.
Why do my eggs become rubbery?
A: That happens when eggs are overcooked or cooked at too high a heat. Pour eggs over gently simmering liquid and cover. Remove from heat as soon as they’re just set.
Is dashi necessary?
A: Dashi gives authentic umami. Chicken broth is a fine substitute, but if you want the classic flavor, instant dashi powder dissolved in water is an easy option.
Can I meal-prep this?
A: You can prepare the sauce and sliced onion ahead and refrigerate for a day. Cook chicken and eggs fresh for best texture when serving.
Conclusion
Oyakodon is a fast, comforting rice bowl that delivers big flavor with minimal fuss—perfect for busy nights and cozy meals alike. For a deeper look at a tested recipe and technique, see this Oyakodon (Japanese Chicken and Egg Rice Bowl) Recipe; for background on the dish’s history and name, consult Oyakodon – Wikipedia.
 Dinner Bowls
 Dinner Bowls
 Dinner Bowls
