Valentine’s Red and White Velvet Cake
A stunning two-layer red and white velvet cake that's perfect for romantic occasions and celebrations, featuring a moist texture and subtle cocoa flavor.

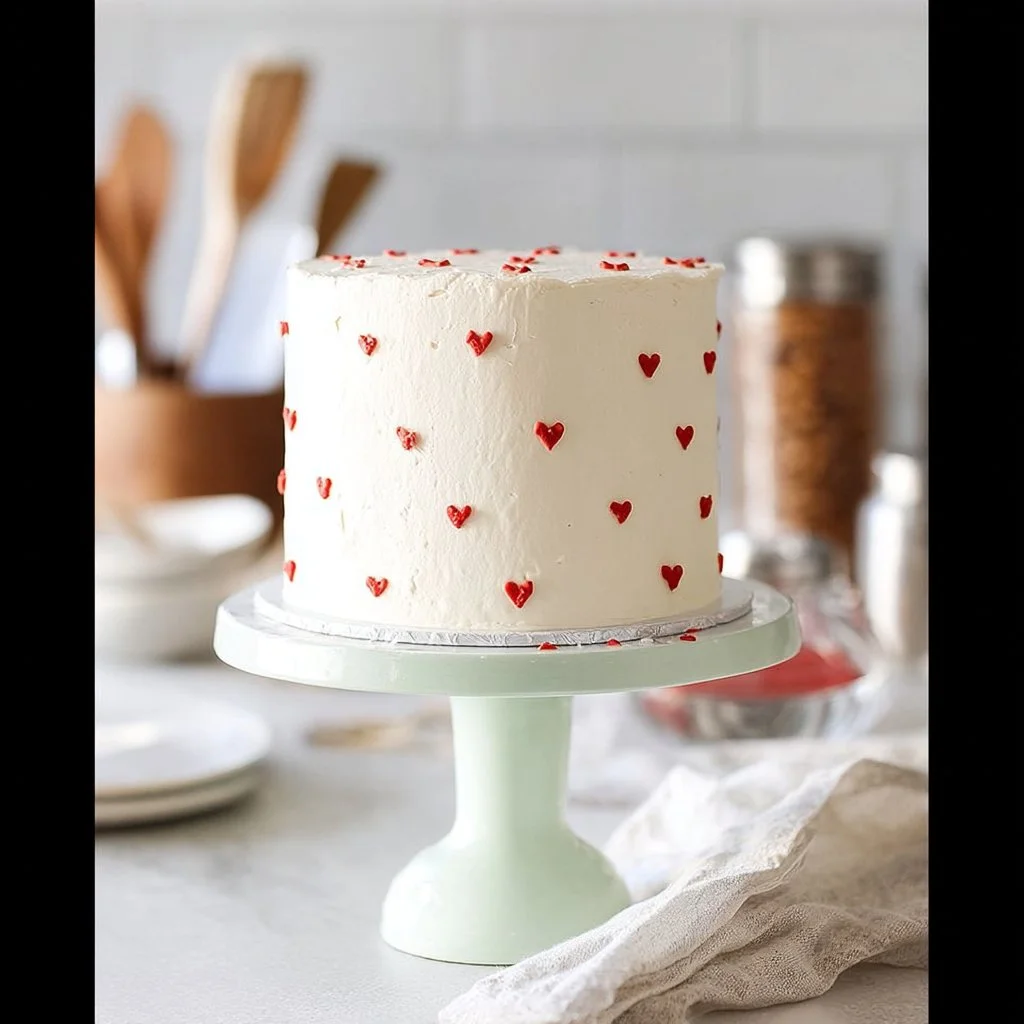
I remember the first time I made this Valentine’s Red and White Velvet Cake—red batter streaking into white, the kitchen smelling of vanilla and cocoa, and a buttercream heart on top that somehow made the whole cake feel downright romantic. It’s a simple two-layer showstopper that’s perfect for date-night desserts, classroom celebrations, or whenever you want a festive, nostalgic treat. If you like red-velvet flavors in small bites, you might also enjoy this rich take on cake balls I often make for parties: red velvet cake balls.
Why you’ll love this dish
This cake delivers eye-catching red and white layers with classic velvet texture—moist, tender crumb and a subtle cocoa note. It’s approachable for home bakers: no complicated techniques, just standard creaming and alternating additions. It’s also flexible—ready for quick Valentine decorating or scaled up for larger celebrations.
Reasons to try it:
- Fast-ish prep: about 20 minutes active work plus baking.
- Kid- and crowd-friendly: familiar flavors and a fun visual contrast.
- Customizable: color intensity, swirl patterns, and frosting designs let you match any theme.
Step-by-step overview
You’ll cream butter and sugar, beat in eggs, and alternate dry flour mixture with buttermilk. Split the batter into two bowls, tint one red and the other very pale (or leave naturally off-white). Bake each color in its own 8-inch pan, cool completely, then sandwich and cover with buttercream. Finish by piping small hearts or simple swirls on top.
What you’ll need
- 2 cups all-purpose flour
- 1 ½ cups granulated sugar
- 1 cup unsalted butter, softened
- 4 large eggs
- 1 cup buttermilk (or 1 cup milk + 1 tbsp white vinegar, rested 5 minutes)
- 1 teaspoon vanilla extract
- 1 teaspoon baking soda
- ½ teaspoon salt
- 1 tablespoon cocoa powder (for classic velvet flavor)
- Red food coloring (gel gives stronger color with less)
- White food coloring (optional — use a touch of white gel if you want the “white” layer brighter)
- Buttercream frosting (for decoration)
Ingredient notes/substitutions:
- For a lighter crumb, sift the flour once or twice.
- If you prefer dairy-free, swap butter for a vegan butter and use a plant-based buttermilk substitute.
- Gel food coloring requires less product and won’t thin the batter like liquids can.
Step-by-step instructions
- Preheat the oven to 350°F (175°C). Grease and flour two 8-inch round cake pans, tapping out excess flour.
- In a medium bowl, sift together the flour, baking soda, cocoa powder, and salt. Set aside.
- In a large bowl, cream the softened butter and granulated sugar with a mixer until light and fluffy, about 3–4 minutes.
- Add the eggs one at a time, mixing well after each addition and scraping the bowl as needed. Add the vanilla.
- With the mixer on low, alternate adding the dry ingredients and the buttermilk to the butter mixture, beginning and ending with the dry ingredients. Mix until just combined—do not overmix.
- Divide the batter evenly into two bowls. Add red food coloring to one bowl; mix until you reach the desired shade. Add a tiny amount of white food coloring to the other bowl only if you want an ultra-bright white—otherwise the batter’s natural color works fine.
- Pour the red batter into one prepared pan and the white batter into the other. If you want swirls, use a toothpick to gently pull through the top a few times—avoid over-swiping.
- Bake for 25–30 minutes, rotating pans once halfway through. A toothpick inserted into the center should come out clean or with a few moist crumbs.
- Cool pans on a rack for 10 minutes, then remove cakes from pans and cool completely before frosting.
- Level layers if needed, spread a layer of buttercream between them, cover the cake, and pipe hearts or decorations on top. Chill briefly to set the frosting before serving.
Valentine’s Red and White Velvet Cake
- Prep
- 20 MIN
- Cook
- 30 MIN
- Total
- 1 HR 50 MIN
- Serves
- 12
01Ingredients
Cake Ingredients
Frosting
02Method
- Preparation
- Mixing and Baking
- Assembly
Tap a step when it's done. The next one lights up.
0 OF 10 DONE03Recipe notes
- 01Store covered at room temperature for up to 2 days. Refrigerate leftovers promptly.
How did it turn out?
No ratings yet. Tap a star to be the first.
Snap a photo and tag @recipe_smoke1 so I can see how yours came out.
How to plate and pair
Serve thin slices on white plates to highlight the color contrast. Pair with:
- A scoop of vanilla bean ice cream for extra indulgence.
- Fresh berries (strawberries or raspberries) to echo the cake’s color and add brightness.
- Espresso or a lightly roasted coffee to balance the sweetness.
For a small gathering, cut into petite wedges and garnish each with a piped buttercream heart.
Storage and reheating tips
At room temperature: keep the frosted cake covered with a cake dome for up to 2 days.
Refrigeration: store in an airtight container for up to 5 days; bring to room temperature before serving to soften the buttercream.
Freezing: wrap cooled unfrosted layers tightly in plastic wrap and foil; freeze up to 2 months. Thaw overnight in the fridge, then frost. For frosted cake, freeze briefly to firm the decoration, then wrap and freeze up to 1 month.
Food safety note: because this contains eggs and dairy, do not leave the cake out for more than 2 hours in warm conditions. Refrigerate leftovers promptly.
Creative twists
- Flavor swaps: add 1–2 teaspoons of instant espresso to the batter for a mocha velvet.
- Toppings: crushed freeze-dried strawberries or edible glitter for a festive finish.
- Mini version: bake in cupcake tins for single-serve treats—reduce baking time to 15–18 minutes.
- Dietary swaps: use gluten-free 1:1 flour blend and vegan butter for a gluten-free/vegan version; expect slightly different texture.
Helpful answers
How long does this cake take from start to finish?
A: Active prep is about 20–30 minutes. Baking and cooling add 1–1.5 hours, depending on how long you wait for the layers to fully cool before frosting.
Can I make the cake ahead?
A: Yes. Bake the layers a day ahead, wrap them tightly, and keep them refrigerated. Frost on the day you plan to serve for the freshest texture.
Can I skip the cocoa powder?
A: You can, but the tablespoon of cocoa gives the cake its traditional velvet note and balances the sweetness. Omitting it will change the classic flavor slightly.
Any tips for getting a true “white” layer?
A: Use minimal white gel coloring (or none) and avoid brown sugar or dark extracts. The natural batter will be off-white; pure white is mostly a visual effect achieved by white gel or shortening-based frostings.
Conclusion
This Valentine’s Red and White Velvet Cake is a simple but striking dessert that brings color and classic flavor to any celebration. For a decorating approach and inspiration with mini hearts, see Curly Girl Kitchen’s Red and White Valentine’s Day Cake tutorial. If you want something similar, my Strawberry Red Velvet Cake is worth a try. Enjoy baking—and have fun piping those hearts.
 Cakes
Cakes Cakes
Cakes Cakes
Cakes
