Sticky Garlic Chicken Noodles Recipe
A saucy, slightly sweet, garlicky one-pan meal that comes together fast for a satisfying weeknight dinner.

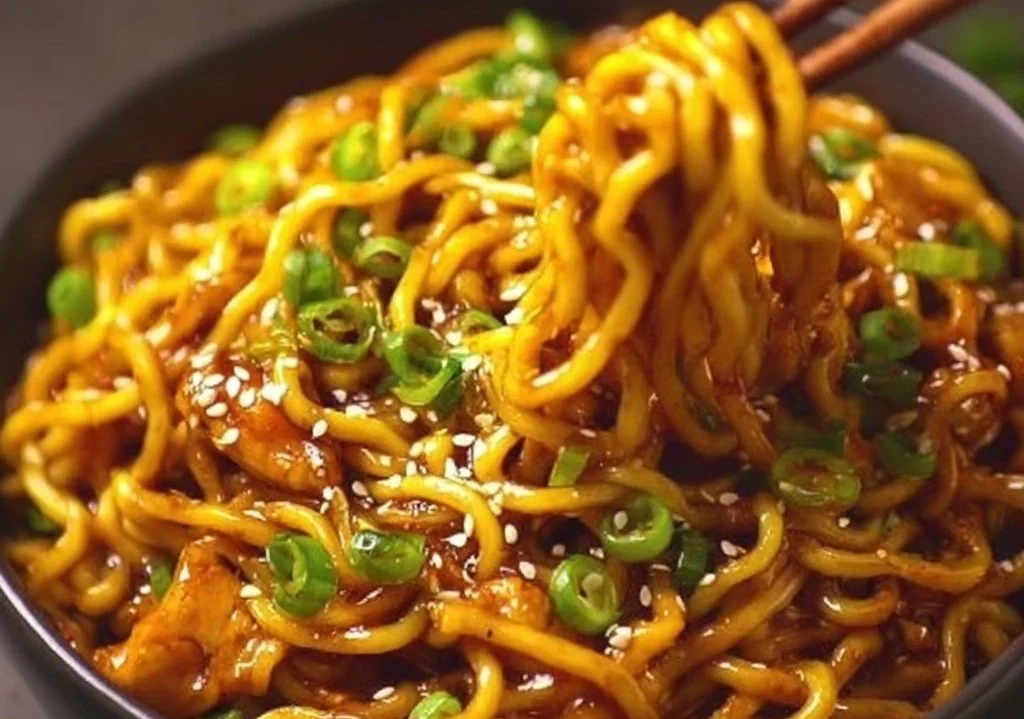
I’ve been making this sticky garlic chicken noodles dish on busy weeknights for years. It’s a saucy, slightly sweet, garlicky one-pan meal that comes together fast and satisfies everyone at the table. The sauce clings to crispy, cornstarch-coated chicken and to slippery noodles — simple comfort that feels a little special.
Why you’ll love this dish
This recipe hits several sweet spots: it’s quick to cook, budget-friendly, and flexible. You can use chicken breasts or thighs, switch noodles depending on your pantry, and dial the heat up or down. It’s perfect for a family weeknight dinner, a meal-prep bowl for work lunches, or a last-minute guest dinner when you want something flavorful without fuss.
Why try it now? If you like the caramelized sweet-salty balance of takeout but want to control ingredients and sodium, you’ll appreciate this homemade version. If you’re curious how the cornstarch trick crisps chicken while making the sauce cling, you’ll find this method satisfying. For a different style of garlic-chicken comfort, compare notes with this slow-cooker option: slow-cooker honey garlic chicken.
The cooking process explained
Overview: you marinate and mix a simple soy-honey-garlic-ginger sauce, toss chicken in cornstarch for crispiness, fry the chicken quickly until golden and cooked through, simmer it briefly with the sauce until sticky, then toss with cooked noodles and top with green onion and sesame. Expect roughly 20–30 minutes from start to finish (active stove time mostly).
Why that order? Coating and frying the chicken first produces browned surfaces that the sauce can cling to. Simmering only briefly after adding the sauce prevents the honey from burning and keeps the sauce glossy.
What you’ll need
- 1 lb chicken breast or thighs, cut into bite-sized pieces (thighs give more flavor and stay juicier; breasts are leaner)
- 1/4 cup soy sauce (use low-sodium if preferred)
- 3 tbsp honey (swap maple syrup for a different flavor)
- 4 garlic cloves, minced
- 1 tsp grated ginger (fresh is best; sub 1/4 tsp powdered if needed)
- 1/2 tsp red chili flakes (optional; increase for heat)
- 2 tbsp cornstarch
- 2 tbsp vegetable oil (neutral oil with a high smoke point)
- 8 oz noodles (rice noodles or egg noodles work well)
- 2 green onions, chopped
- 1 tsp sesame seeds (optional)
Notes/substitutions: For gluten-free, use tamari and rice noodles. If you prefer more sauce, add 2–3 tablespoons of water or chicken broth and adjust seasoning. For a richer flavor, swap half the oil for toasted sesame oil at the end (use sparingly).
For another garlic-forward chicken idea that uses a buttery finish, you might like this garlic-butter chicken recipe: garlic-butter chicken.
Step-by-step instructions
- Make the sauce: Whisk together soy sauce, honey, minced garlic, grated ginger, and red chili flakes in a bowl. Set aside.
- Coat the chicken: Toss the bite-sized chicken pieces with cornstarch until evenly coated. Shake off any excess.
- Heat the pan: Warm 2 tablespoons of vegetable oil in a large skillet or wok over medium-high heat until shimmering.
- Fry the chicken: Add the coated chicken in a single layer (work in batches if needed). Cook 6–8 minutes, stirring occasionally, until golden brown and cooked through. Chicken should reach an internal temperature of 165°F (74°C).
- Add the sauce: Pour the prepared sauce over the chicken. Stir to coat and let simmer 2–3 minutes, until the sauce thickens and becomes sticky. Watch carefully so the honey doesn’t scorch.
- Cook the noodles: Meanwhile, prepare the noodles according to package directions. Drain well.
- Toss everything: Add the cooked, drained noodles to the skillet. Toss gently so the sauce and chicken are distributed evenly and everything is hot.
- Finish and serve: Sprinkle chopped green onions and sesame seeds on top. Serve immediately.
Short tip: cook the noodles just until al dente and drain thoroughly—no one wants gummy noodles.
Sticky Garlic Chicken Noodles
- Prep
- 15 MIN
- Cook
- 15 MIN
- Total
- 30 MIN
- Serves
- 4
01Ingredients
For the Chicken
For the Sauce
For the Noodles and Toppings
02Method
- Preparation
- Cooking
- Serving
Tap a step when it's done. The next one lights up.
0 OF 8 DONE03Recipe notes
- 01For gluten-free, use tamari and rice noodles. If you prefer more sauce, add 2–3 tablespoons of water or stock. For richer flavor, swap half the oil for toasted sesame oil at the end.
How did it turn out?
No ratings yet. Tap a star to be the first.
Snap a photo and tag @recipe_smoke1 so I can see how yours came out.
Best ways to enjoy it
- Plate: Twirl a nest of noodles, top with chicken and sauce, and scatter green onions and sesame seeds.
- Sides: Offer a simple cucumber salad, steamed bok choy, or quick sautéed greens to cut the richness.
- Pairings: A cold citrus soda or a lightly sweet pear spritzer complements the sticky-sweet sauce. For a low-calorie option, serve with extra steamed vegetables instead of more noodles.
Storage and reheating tips
Refrigerate: Store leftovers in an airtight container for up to 3–4 days.
Reheat: Reheat gently in a skillet over medium heat with a splash of water or broth to loosen the sauce, or microwave in 30-second bursts, stirring between intervals.
Freeze: Freeze in a shallow airtight container for up to 2 months. Thaw overnight in the fridge before reheating. Note: noodles can change texture after freezing; for best results, freeze chicken and sauce separately from noodles.
Food safety: Cool food to room temperature no longer than 2 hours before refrigerating. Reheat to at least 165°F (74°C) before serving.
Recipe variations
- Sticky Sesame Chicken: Add 1 tbsp toasted sesame oil and 1 tbsp rice vinegar to the sauce. Increase sesame seeds on top.
- Spicy Chili-Garlic: Swap red chili flakes for 1–2 tbsp of your favorite chili-garlic sauce or sriracha.
- Veggie-packed: Toss in bell peppers, snap peas, or shredded carrots when you add the sauce for color and crunch.
- Vegetarian version: Replace chicken with fried tofu or crispy seitan. Toss the tofu with cornstarch and pan-fry the same way.
- Low-sugar: Reduce honey to 1½ tbsp and add 1 tbsp low-sodium chicken broth + 1 tsp cornstarch slurry if you want more sauce volume without sweetness.
Your questions answered
How long does this take to make?
A: Active prep and cook time is about 20–30 minutes. Prep (chopping and mixing) takes 10–15 minutes; cooking is mostly 10–15 minutes.
Can I use frozen chicken?
A: It’s best to thaw chicken completely and pat dry before coating with cornstarch. Partially frozen chicken won’t cook evenly and prevents a good crust.
Can I make this ahead for meal prep?
A: Yes. Store chicken and noodles separately in the fridge for up to 4 days. Reheat chicken with a splash of water in a skillet, then toss with warmed noodles.
Is this gluten-free?
A: Use tamari instead of soy sauce and choose rice noodles to make it gluten-free. Check the cornstarch packaging (most are gluten-free).
How do I prevent the sauce from becoming grainy or burnt?
A: Keep the heat moderate when simmering the sauce and stir often. If you reduce too far, add a splash of water or broth and reheat gently.
Conclusion
If you want a slightly different take on garlic-chicken noodles, try the 20 minute Crispy Garlic Chicken Noodles for a faster pan-fry approach. Looking for more? Try my Sticky Garlic Chicken Noodles Recipe.
 Chicken
 Skillet Dinners
 Chicken
